
Restore Your Stained Ceiling to Perfection Without Calling a Pro
Immediate Emergency Steps to Stop the Leak and Protect Your Home
To repair ceiling water damage, first stop the moisture source, then drain any pooled water and dry the cavity below safe moisture thresholds. After that, cut out damaged drywall, install backing cleats, tape and mud the patch, and apply stain-blocking primer and paint. When water starts pooling overhead, treating the situation with urgency will save your flooring, furniture, and structural framing. Before grabbing spackle or paint, your absolute priority is personal safety and mitigating active moisture spread.
Water and electricity are a hazardous combination. If the leak is dripping through a light fixture, ceiling fan, or near recessed cans, head straight to your electrical panel and flip the breaker powering that entire room. Never flip wall switches or handle wet ceiling fixtures while the circuit is live.
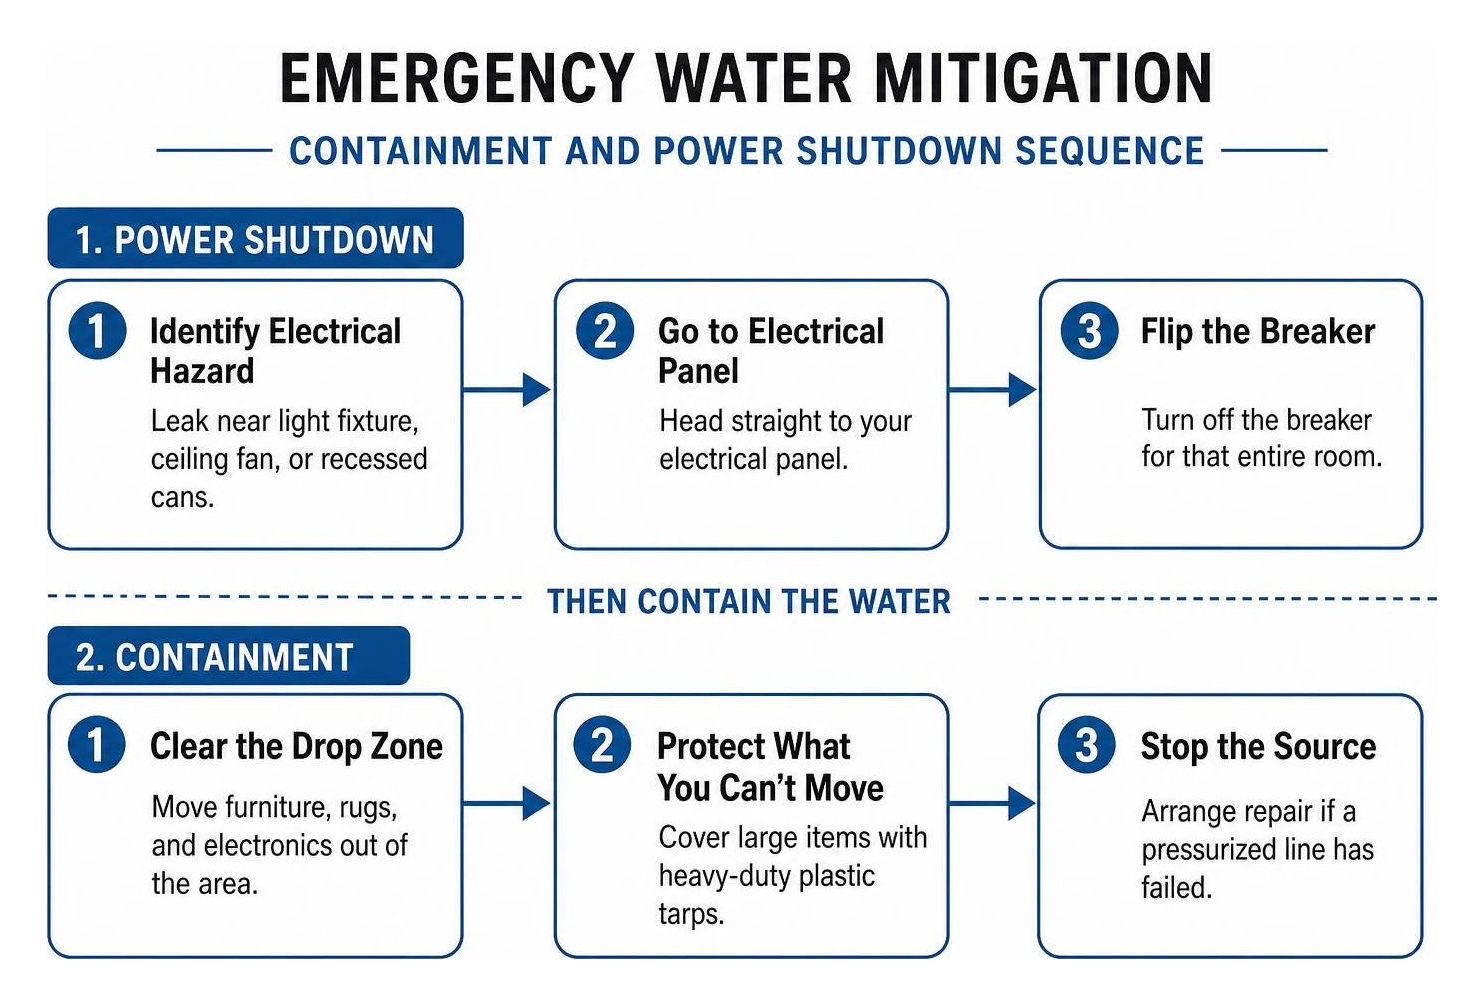
Once electrical hazards are neutralized, move all furniture, rugs, and electronics out of the drop zone. If large items cannot be relocated, drape them with heavy-duty plastic tarps. For detailed protocols on cutting off main supplies, consult our emergency water leak guide for homeowners. If a pressurized indoor line has failed, arranging immediate burst pipe repair will halt gallons of water before the ceiling gives out completely.
Relieving Water Pressure and Containing Spills
Drywall acts like a sponge. As it absorbs moisture, it weakens, gains massive weight, and sags into an unsightly bubble. If you see a swollen blister hanging down, that drywall is holding pooled water behind it. Leaving it alone risks an uncontrolled blowout that can bring down entire gypsum sheets and soak your room.
You can prevent catastrophic collapse through a controlled drain:
- Position a sturdy 5-gallon bucket directly beneath the lowest point of the bulge.
- Lay a plastic drop cloth or trash bags across the floor around the bucket to catch errant splashes.
- Take a long screwdriver, awl, or drywall knife and carefully poke a small puncture hole directly into the center of the sagging blister.
- Step back and allow the pooled water to drain cleanly into the bucket.
Relieving this hydraulic weight allows the ceiling framing to breathe, prevents joist deflection, and keeps the damage localized to a small, patchable radius.
Finding and Fixing the Moisture Source
Never attempt cosmetic drywall repairs until the source of moisture is 100% resolved. Painting over an active or intermittent leak is like putting a small adhesive bandage over a running faucet—the water will always win.
Ceiling water generally originates from three primary culprits:
- Roofing and Exterior Penetrations: Degraded roof pipe boots (which regularly crack after 10 to 15 years of sun exposure), displaced architectural shingles, and rusted chimney flashing allow rainwater to track along rafters before settling on your ceiling.
- Plumbing Failures: Water lines feeding second-story showers, worn toilet wax rings, dripping sink P-traps, or loose supply tubes create continuous or usage-dependent rings below bathrooms. Resolving these hidden drips requires timely water leak repair to avoid recurring gypsum rot.
- HVAC Condensate Overflow: During hot summer months, clogged air conditioner drain pans or sweating ductwork in unconditioned attics can dump condensation straight into ceiling insulation.
Trace the dampness back to its point of origin. That water loves gravity and can travel horizontally across joists for several feet before soaking through the drywall below.
DIY vs. Professional Ceiling Water Damage Repair: Assessing the Severity
Not every wet spot demands a full restoration crew, but underestimating ceiling saturation can lead to hidden mold colonies and structural failure. Professional guidelines, such as those established by the IICRC water damage standards guide, classify water events based on contamination levels (Clean Category 1 up to Blackwater Category 3) and saturation volume.
| Damage Criteria | Minor DIY Candidate | Moderate Repair Needed | Severe Professional Action |
|---|---|---|---|
| Stain Size | Under 6 inches (isolated ring) | 6 inches to 24 inches | Spans multiple sheets or entire room |
| Drywall Texture | Hard, firm, no crumbling | Soft spots, localized sagging | Bowed, crumbling, falling down |
| Water Source | Clean supply line / minor spill | Clean / greywater pipe drip | Sewage backflow, roof deluge |
| Odor & Mold | No musty smell present | Slight damp odor | Visible black/green mold colonies |
| Insulation State | Bone dry above sheetrock | Slightly damp in small area | Completely saturated cellulose/fiberglass |
| Typical Cost Range | $50 – $150 (DIY materials) | $300 – $800 (Patch/Blend) | $1,000 – $5,000+ (Full rebuild) |
A dependable benchmark is the 25% replacement rule: if more than 25% of an individual room’s ceiling exhibits sagging, structural softness, or mold colonization, spot patching is no longer structurally sound. The entire affected ceiling plane should be taken down to the framing.
Signs That Indicate Minor Cosmetic Damage
You can comfortably handle the repair yourself if the stain is under 6 inches in diameter, the water source has been eliminated, and the gypsum core passes the “push test.”
To perform a push test, firmly press your thumb or the blunt end of a screwdriver against the stained drywall. If the surface remains rock-hard and does not indent, flake, or feel spongy, the internal plaster core has retained its structural integrity. If there is zero mildew odor and only faint yellowing or hairline paint cracking, simple stain sealing and paint blending will restore the surface.
When to Call in the Experts
Ceiling repairs cross into professional restoration territory when safety hazards emerge:
- Structural Joist Rot: If framing members are dark, spongy, or show signs of fungal wood decay.
- Category 3 Contamination: Water originating from sewage pipes, standing floodwaters, or long-standing stagnant HVAC pans carrying biohazards.
- Large-Scale Mold: Any visible fuzzy black or dark-green patches exceeding 10 square feet.
- Widespread Sagging: When entire drywall sheets pull away from joist screws, creating immediate collapse risks.
If you encounter any of these scenarios in cities like Austin, Denver, Indianapolis, or Phoenix, calling an emergency structural remediation specialist is the safest choice for your household.
Step-by-Step Guide to Drying Out the Ceiling Cavity
Drywall holds moisture long after the visible surface feels dry to the touch. Because mold spores colonize moist cellulose materials within 24 to 48 hours, establishing a rapid structural drying setup is critical before any patchwork begins.
Moisture Testing and Humidity Control
Never guess when it comes to moisture levels. Professional structural drying is only considered complete when wood framing materials are confirmed to be below 16% moisture content (ideally under 12% for safe drywall compound adhesion).
To accelerate drying:
- Set up commercial-grade or high-velocity household box fans pointed directly upward at the damp ceiling area to keep air shearing across the surface.
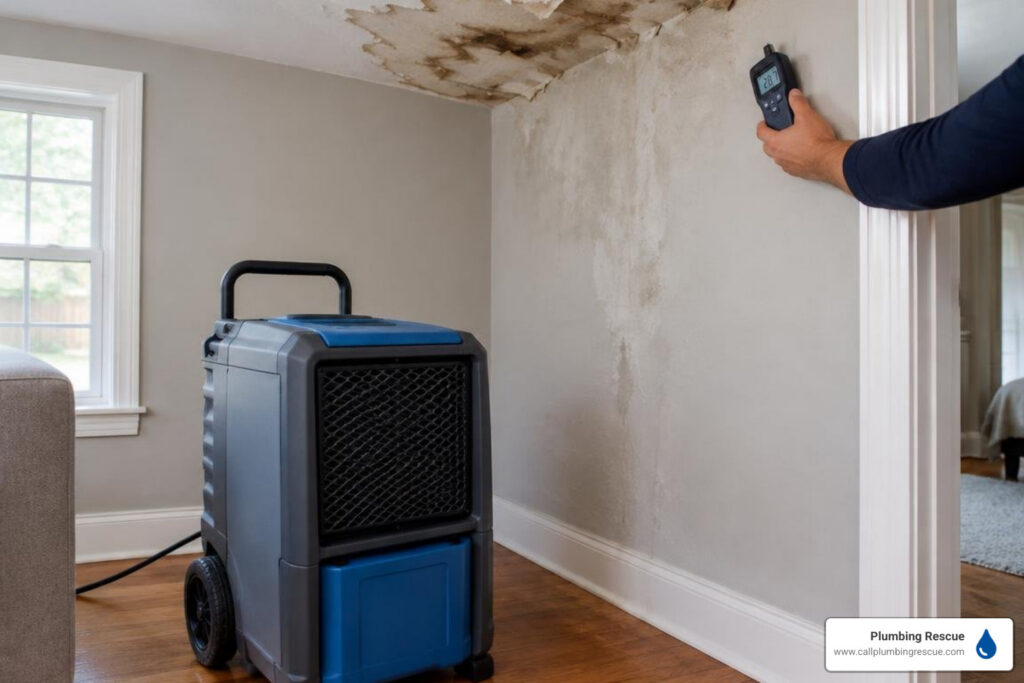
- Run a heavy-duty dehumidifier continuously in the sealed room to pull relative indoor humidity levels below 50% (ideally 30% to 40%).
- Monitor the drywall using a pinless or penetrating pin moisture meter.
Take readings across several points around the perimeter of the stain. The stain you see on the surface is almost always smaller than the actual damage hidden above it. Continue your dehumidification effort until both the drywall and adjacent joists test well beneath the 12% moisture ceiling.
Removing Wet Insulation and Debris
If the ceiling leak occurred below an attic space, you must inspect the framing from above. Damp insulation acts like a wet thermal blanket, trapping water against the upper side of the drywall and keeping joists damp for weeks.
Put on an N95 respirator, safety goggles, and heavy work gloves. Rake back or bag up all saturated blown-in cellulose or fiberglass batts directly over the leak site. Cellulose insulation clumps and loses its R-value when wet, while fiberglass backing can quickly trap hidden mold spores.
Once the cavity is clear, spray the exposed wooden joists with an EPA-registered antimicrobial spray or botanical fungicide to sanitize the wood. Keep the attic space ventilated with air movers until the framing is dry to the touch.
How to Patch, Mud, and Paint Water-Damaged Drywall
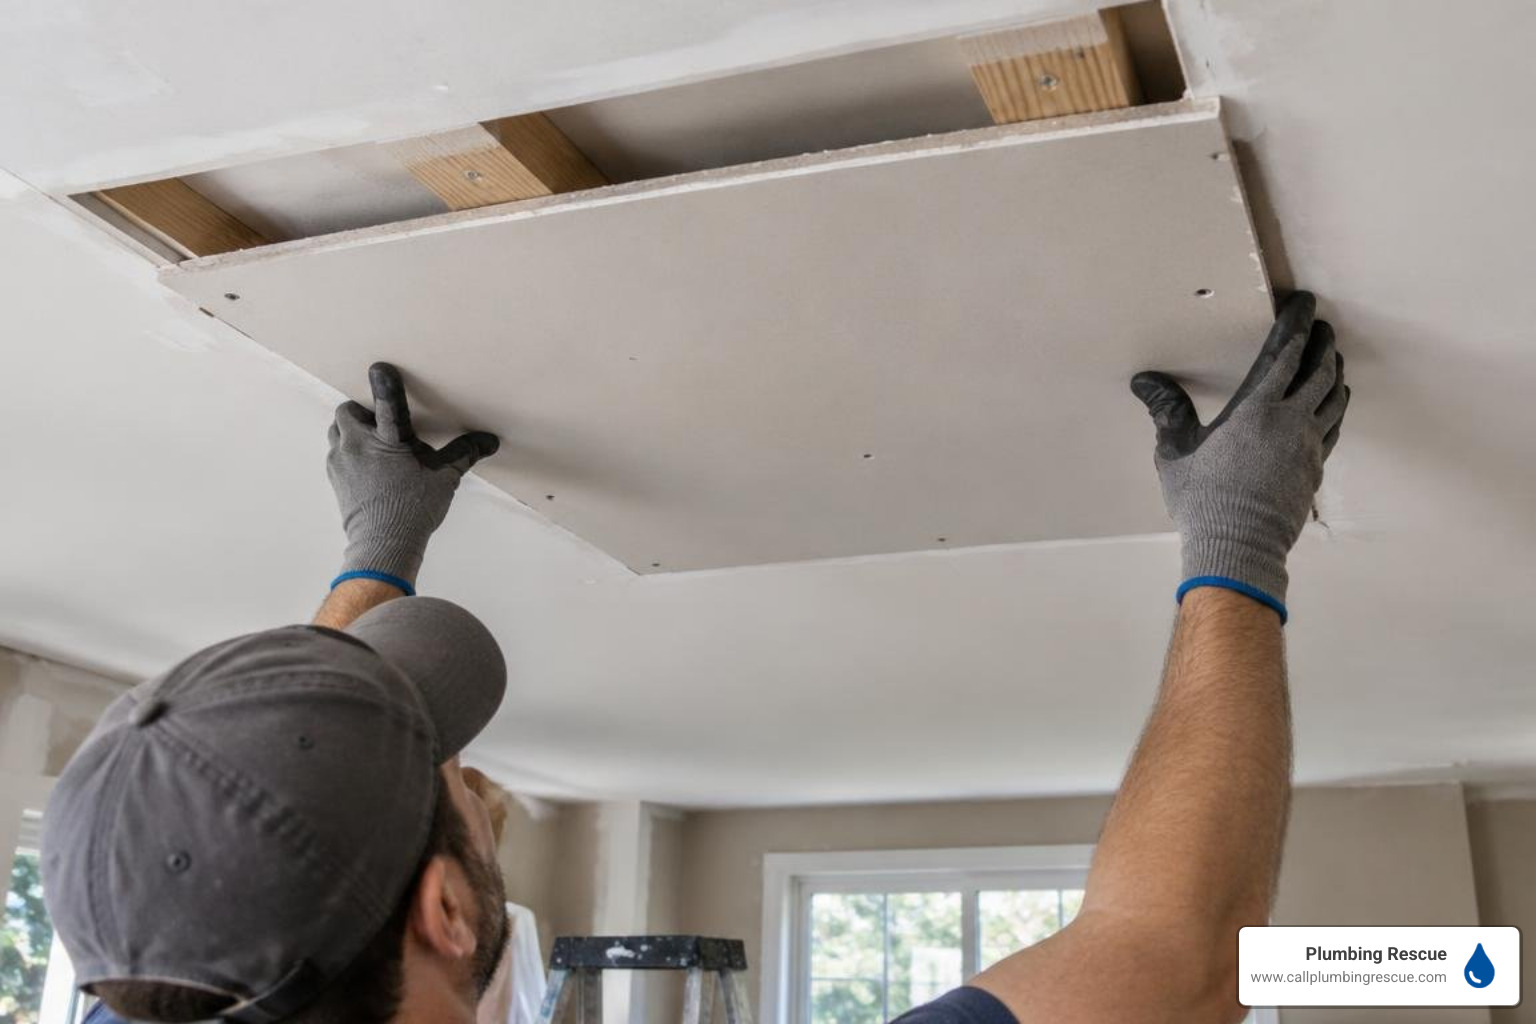
Once your moisture meter confirms the ceiling cavity is dry, you can begin the physical repair. Follow this step-by-step restoration workflow to achieve a seamless, invisible patch.
Essential Tools for Ceiling Water Damage Repair
Gather the proper materials before starting:
- PPE: N95 dust mask, wrap-around safety goggles, drop cloths.
- Cutting & Measuring: Utility knife, jab saw (drywall saw), tape measure, framing square, pencil.
- Framing & Fasteners: 1×3 or 2×4 scrap wood cleats, 1-1/4 inch coarse-thread drywall screws, cordless drill.
- Finishing Supplies: Replacement drywall sheet (matching existing 1/2-inch or 5/8-inch thickness), fiberglass mesh drywall tape, all-purpose joint compound.
- Drywall Tools: Mud pan, 6-inch flexible taping knife, 10-inch or 12-inch feathering knife, 120-grit sanding sponge.
- Coatings: Shellac-based or oil-based stain-blocking primer, ceiling paint matching your sheen.
For visual diagrams on cutting clean joints, check out these step-by-step ceiling patching techniques to ensure your cuts are aligned properly.
Step 1: Cut Out the Compromised Drywall
Never patch an irregular, jagged hole. It is far easier to tape and finish a clean rectangle:
- Use a framing square and pencil to draw a neat square or rectangle around the damaged drywall, extending at least 2 inches beyond the soft or stained area.
- Verify there are no hidden electrical cables or plastic plumbing lines resting directly on top of the drywall sheet.
- Cut along your marked pencil lines using a manual jab saw or utility knife.
- Remove the damaged section and clean away any loose gypsum dust along the cutout edges.
Step 2: Install Wooden Backer Cleats
Because your cutout will likely span the gap between ceiling joists, the new drywall patch needs solid backing along all four edges to prevent joints from cracking over time:
- Cut two pieces of 1×3 lumber roughly 4 to 6 inches longer than the cutout hole.
- Slip the wooden cleats into the ceiling cavity, positioning them behind the existing drywall so half the wood width is exposed in the cutout opening.
- Secure the cleats through the existing ceiling drywall using 1-1/4 inch drywall screws spaced every 6 inches. Countersink the screw heads slightly beneath the paper surface without tearing through.
Step 3: Fasten the Drywall Patch
- Measure your cutout accurately and cut a matching patch piece from fresh drywall, leaving a 1/8-inch perimeter gap for joint compound expansion.
- Place the patch into the opening and secure it directly to the wooden cleats and exposed joists using 1-1/4 inch drywall screws spaced every 6 to 8 inches.
Step 4: Tape and Apply Joint Compound
- Apply self-adhesive fiberglass mesh tape over all four seams of the patch.
- Scoop all-purpose joint compound into your mud pan. Using a 6-inch taping knife, press a smooth base coat of compound directly through the mesh tape into the seam gaps.
- Let the first coat dry completely (typically 12 to 24 hours depending on room humidity).
- Switch to a 10-inch or 12-inch knife to apply a second, wider feathering coat, extending the mud 6 to 8 inches beyond the tape lines to taper the ridge gradually.
- Once dry, apply a very thin third skim coat if needed. Sand the dried compound with a 120-grit sanding sponge using light, circular strokes until the transition is smooth and flat.
Sealing Stains and Matching Texture
If you apply standard water-based latex paint directly over an old water stain, the water-soluble tannins and mineral salts trapped in the drywall paper will bleed right through your fresh topcoat, creating a recurring yellow halo.
Always roll on a dedicated oil-based or shellac-based stain-blocking primer over the entire patched and sanded surface. Allow the primer to cure for the manufacturer’s recommended time (usually 1 to 2 hours).
If your ceiling features a texture (such as orange peel or knockdown), use an aerosol ceiling texture spray:
- Practice your spray technique on a scrap piece of cardboard first to calibrate the nozzle pattern.
- Lightly spray the texture over the patched area, feathering the edges outward into the surrounding ceiling pattern.
- Allow the texture to dry, then apply two coats of high-quality flat ceiling paint across the entire ceiling plane to ensure complete color uniformity.
Frequently Asked Questions About Ceiling Repairs
How quickly can mold develop after a ceiling leak?
Under warm, humid conditions, mold spores can begin germinating on wet ceiling drywall paper, wood framing, and damp insulation within 24 to 48 hours. Because drywall contains cellulose and holds moisture for extended periods, aggressive drying with dehumidifiers and fans must begin immediately after a leak occurs.
Does homeowners insurance cover ceiling water damage?
Standard homeowners insurance policies typically cover ceiling water damage if it stems from a sudden and accidental event, such as a burst frozen pipe, water heater failure, or storm debris puncturing a roof.
However, insurance policies routinely exclude gradual damage resulting from deferred maintenance, chronic slow plumbing drips, or long-term roof wear. Document the damage thoroughly with clear photographs before starting demolition, and retain all receipts for temporary mitigation supplies.
What are the average costs of ceiling water damage repair?
Repair costs vary based on the extent of saturation:
- Minor Cosmetic Repair: $300 to $800 for localized stain sealing, minor patching, and painting.
- Moderate Drywall Replacement: $1,000 to $3,500 for replacing saturated drywall panels and insulation across an entire room.
- Severe Structural Reconstruction: $5,000 to $15,000+ if the water compromised structural ceiling joists, electrical wiring, or required extensive multi-room mold remediation.
Conclusion
A water stain on your ceiling does not have to turn into an overwhelming home improvement crisis. By shutting off power, releasing trapped water with a controlled puncture, and drying out the cavity below safe moisture thresholds, you can successfully patch, tape, and paint your drywall back to a smooth finish.
If your ceiling water damage is the result of an active plumbing leak, overflowing fixture, or frozen supply line, do not wait for the ceiling to sag. The team at Plumbing Rescue is on standby 24/7 with rapid dispatch across Austin, Denver, Indianapolis, and Phoenix. We route local technicians straight to your door day or night to fix the underlying leak, protect your framing, and keep your home safe and dry.
Dealing With This Yourself? Get Connected With a Local Plumber.
Skip the guesswork — one call connects you with a local plumbing provider. Available 24/7, no forms.
Call Now: (888) 686-0698