
When a Pipe Bursts, Every Minute Costs You Money
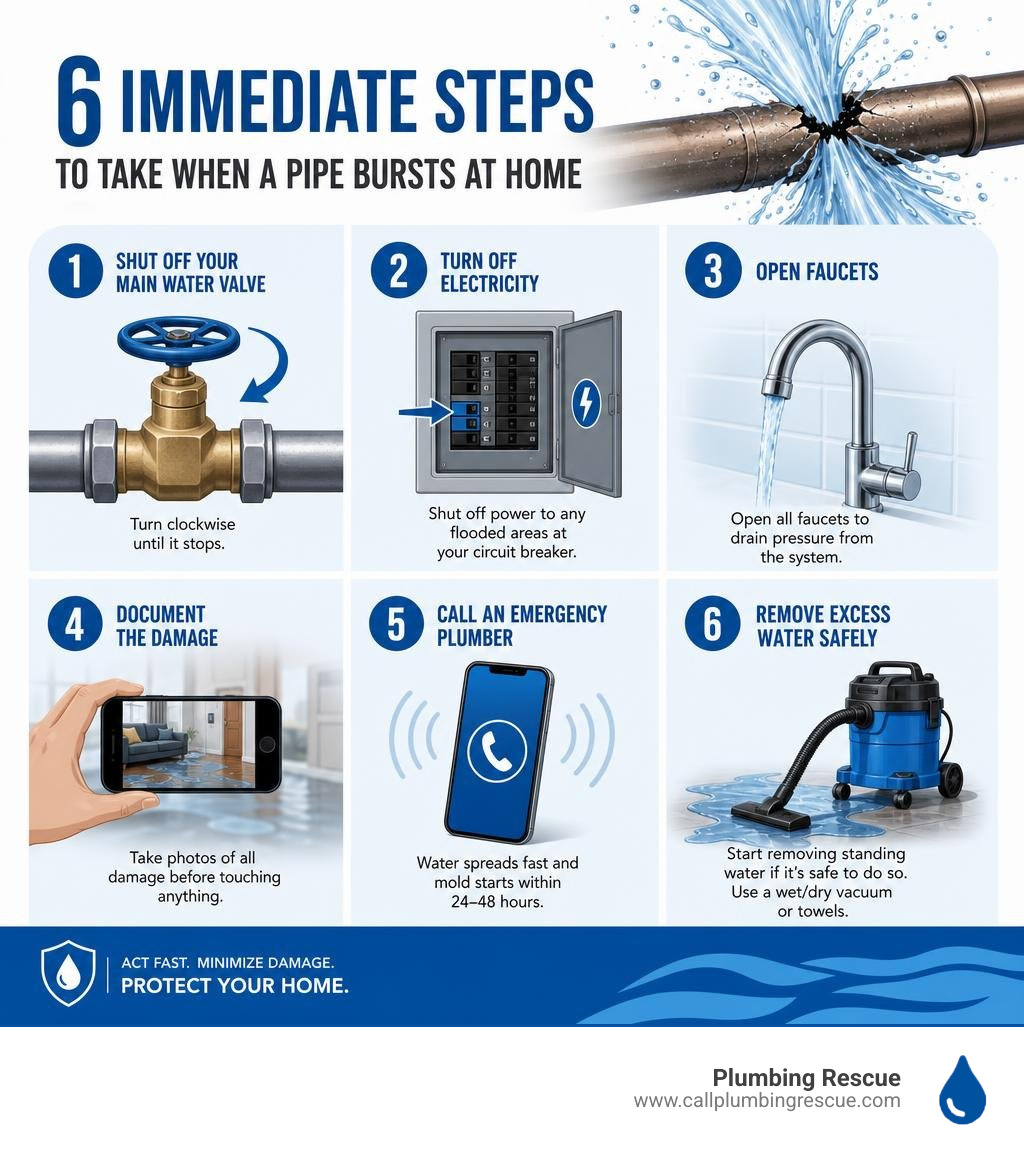
Burst pipe repair needs to happen fast. Here’s what to do right now:
- Shut off your main water valve (turn clockwise until it stops)
- Turn off electricity to any flooded areas at your circuit breaker
- Open faucets to drain pressure from the system
- Document the damage with photos before touching anything
- Call an emergency plumber — water spreads fast and mold starts within 24–48 hours
A half-inch supply line at normal home water pressure can dump 400–600 gallons of water per hour into your home. That’s not a slow drip — that’s a flood.
One homeowner in Chicago woke up at 2 AM to the sound of water hitting hardwood floors. By the time the water was shut off, 40 minutes had passed. The difference between catching a burst pipe in 5 minutes versus 40 minutes can mean the difference between a $1,500 cleanup and a $12,000+ restoration bill.
The good news? Knowing exactly what to do — before panic sets in — changes everything.
I’m Ben Smith, a digital marketing strategist with over 25 years of experience working alongside home services businesses, including emergency plumbing companies specializing in burst pipe repair and water damage response. In this guide, I’ll walk you through everything you need to know — from stopping the flood in the first five minutes to navigating insurance claims.
Basic burst pipe repair vocab:
The First 5 Minutes: Immediate Steps to Stop the Flood
When you hear the terrifying sound of rushing water or see a wall bubbling like a cheap science experiment, panic is your worst enemy. Speed is your best friend. What you do in the first five minutes determines whether you will need a simple patch or a full-scale home rebuild.
Step 1: Shut Off the Main Water Supply
You must stop the flow of water immediately. Do not waste time looking for the exact leak point yet; go straight to your main water shut-off valve.
In most homes, this valve is located near the water meter, in the garage, in a utility closet, or where the main water line enters the foundation. If you live in warmer climates like Phoenix or Austin, it might be located in an outdoor plastic box near the street curb. Turn the handle clockwise (to the right) until it stops. If it is a lever-style ball valve, turn the lever perpendicular to the pipe.

Step 2: Cut the Power
Water and electricity are a lethal combination. If water is pooling near outlets, baseboard heaters, appliances, or dripping through ceilings, head straight to your main electrical panel (circuit breaker) and shut off power to the affected zones. If the panel itself is wet or standing in water, do not touch it — call an electrician immediately.
Step 3: Drain the System (Pressure Relief)
Once the main water supply is off, there is still pressurized water trapped in your home’s pipes. Open the cold and hot water faucets at the lowest point of your home (such as a basement utility sink or a first-floor tub) and work your way up to the highest faucets. Flush all toilets. This drains the remaining water out of the system safely through the drains rather than letting it escape through the burst hole.
For a deeper dive on containing the initial rush, check out our guide on how to Stop the Flow: Your Guide to Repairing a Burst Pipe.
Step 4: Document the Damage
Before you start cleaning up, pull out your phone and take high-resolution photos and videos of the burst pipe, the standing water, and any damaged belongings. This real-time evidence is gold when dealing with insurance adjusters.
Step 5: Call for Backup
Once the immediate danger is contained, contact a professional. We route emergency calls directly to skilled technicians in your local area to ensure rapid response times. Learn more about managing your home while waiting for help with our guide: Don’t Tread Water While Waiting for a 24/7 Burst Pipe Service.
Why Do Pipes Burst? Causes, Signs, and Material Risks
Pipes do not burst without a reason. Understanding why they fail helps you prevent future disasters and choose the right burst pipe repair strategy.
- Freezing Temperatures: When water freezes, it expands by about 9% in volume. However, the ice plug itself does not always break the pipe. Instead, as the ice expands, it pushes liquid water down the line toward closed fixtures. This creates catastrophic hydrostatic pressure (often exceeding 4,000 PSI) between the ice plug and the closed faucet, eventually tearing the pipe wall open.
- Excessive Water Pressure: Normal residential water pressure should sit comfortably between 40 and 60 PSI. If your pressure regulator fails and water pressure spikes above 60–80 PSI, it places constant stress on joints, valves, and weakened pipe walls, leading to sudden ruptures.
- Water Hammer: When a valve closes suddenly, the rushing water slams into a dead end, creating a shockwave known as water hammer. Over time, these repetitive vibrations weaken joints and cause pipes to pull apart or crack.
- Corrosion and Aging Infrastructure: Older metal pipes corrode from the inside out due to chemical reactions with minerals in municipal water, thinning the pipe walls until they can no longer hold standard pressure.

Signs of a Hidden Leak
Not all pipe bursts happen with a dramatic bang. Many start as slow pinhole leaks behind drywall or under subfloors, gradually weakening the material until a major rupture occurs. Watch out for these warning signs:
- Unexplained Water Bill Spikes: If your water usage jumps suddenly without changes in your habits, water is escaping somewhere.
- Musty Odors or Mold Growth: Damp, dark wall cavities are breeding grounds for mold, which can begin growing within 24 to 48 hours.
- Soft, Wet, or Discolored Spots: Bubbling paint, peeling wallpaper, or dark stains on walls and ceilings indicate water accumulation.
- Hissing or Dripping Sounds: If you hear running water when all faucets and appliances are turned off, a pipe is actively leaking.
- Water Meter Movement: Check your physical water meter dial when no water is running. If the low-flow indicator (often a small red triangle) is spinning, you have an active leak.
If you suspect a hidden leak but want to keep your composure, read our advice on How to Handle a Council Bluffs Pipe Burst Without Losing Your Cool.
How Pipe Materials Affect Burst Pipe Repair Risk
Different pipe materials come with unique lifespans, structural limits, and burst risks.
| Pipe Material | Common Era | Lifespan | Freeze/Burst Risk | Common Failure Mode | Repair Suitability |
|---|---|---|---|---|---|
| Copper | 1960s–Present | 50–70 Years | Moderate | Pinholes from interior corrosion, split seams when frozen | Excellent (rigid, easy to cut and splice with push-connect or solder) |
| CPVC | 1980s–2000s | 20–35 Years | High | Becomes highly brittle with age and chemical exposure, cracks easily | Moderate (requires careful cutting to avoid shattering) |
| PEX | 1990s–Present | 40–50+ Years | Low | Fitting failure, physical puncture | Excellent (highly flexible, can stretch up to 1.5x its diameter before bursting) |
| Galvanized Steel | Pre-1970 | 40–50 Years | High | Internal rust, thread failure, systemic clogging | Poor (usually requires partial or whole-home repiping) |
| Polybutylene | 1978–1995 | 10–25 Years | High | Chemical breakdown from water treatment additives | Extremely Poor (no longer code-compliant; full replacement recommended) |
Step-by-Step DIY Burst Pipe Repair Guide
If the burst section of pipe is easily accessible (such as in an open basement, utility room, or crawlspace) and is made of copper, PEX, or CPVC, you can perform a temporary or permanent DIY burst pipe repair using modern push-to-connect fittings.
Tools and Materials Needed:
- Pipe cutter (specifically designed for copper/plastic or a PEX cutter)
- Deburring tool and emery cloth (for copper)
- Tape measure and permanent marker
- A section of matching pipe (PEX is highly recommended for replacements due to its flexibility)
- Two push-to-connect slip couplings (such as SharkBite Max, which requires half the insertion effort of older generations)
The Step-by-Step Process:
1. Prepare the Pipe
Ensure the water is completely shut off and the system is fully drained. Use your pipe cutter to remove the damaged portion of the pipe. You should cut out at least 5 inches in each direction from the burst site (removing a minimum of 10 inches of pipe total) to ensure you are splicing into healthy, unweakened material.
2. Clean and Deburr
For copper pipes, use a deburring tool on the inside and outside of the cut ends to remove any sharp copper burrs. Sand the outer surface clean with emery cloth until it is bright and smooth. For PEX or CPVC, ensure the cut is perfectly square and clean. Any debris or unevenness will ruin the watertight seal.
3. Mark the Insertion Depth
Measure and mark the correct insertion depth on the existing pipe ends using a marker. This ensures that when you push the fittings on, they seat fully and lock into place.
4. Install the Splicing Section
Measure the gap between the cut pipes, subtract the fitting allowance, and cut your replacement section of PEX or copper to size. Push the push-to-connect fittings onto the existing pipe ends until they reach your depth marks. Insert your new pipe section into the other ends of the fittings until they click and lock.
5. Slow Pressure Test
Have someone stand near the repair while another person slowly opens the main water valve. Watch the connections closely for any signs of weeping or dripping. Keep the line under full pressure for at least 15 to 30 minutes before declaring the repair a success.
For more information on winterizing your lines and avoiding these steps entirely, check out Winter is Coming for Your Plumbing: Frozen Pipe Repair Services.
Professional Restoration: Timeline, Costs, and Insurance
While fixing the physical pipe is a plumbing task, dealing with the aftermath of water damage is a restoration challenge.
- Phase 1: Assessment and Extraction (Day 1): Restoration professionals use thermal imaging cameras to locate hidden moisture trapped behind drywall and under floors. Industrial truck-mounted vacuums extract standing water.
- Phase 2: Structural Drying (Days 2–5): High-velocity air movers and industrial-grade dehumidifiers circulate dry air to pull moisture out of wall studs, subfloors, and drywall. Drywall wicks water upward 18 to 24 inches above the visible water line, so technicians often cut away the bottom 2 feet of drywall to ensure proper drying.
- Phase 3: Antimicrobial Treatment (Day 5): Technicians apply EPA-approved antimicrobial sprays to prevent mold spores from colonizing wet wood and drywall.
- Phase 4: Rebuild and Restoration (Weeks 2–4): Once moisture meters confirm the home is completely dry, structural repairs begin. This includes hanging new drywall, installing insulation, and replacing flooring.
Navigating Insurance Claims
Most standard homeowners insurance policies (such as HO-3 policies) cover sudden and accidental water damage caused by a burst pipe. This includes the cost of water extraction, structural drying, mold remediation, and rebuilding your home.
However, there is an important catch: insurance typically does not cover the cost of the plumbing repair itself (the $200–$500 fee to fix the pipe). Additionally, if the burst was caused by neglect — such as leaving a home unheated during a freezing winter without draining the lines — the claim may be denied.
To ensure your claim goes smoothly:
- Document everything with timestamped photos.
- Keep all receipts for emergency repairs and temporary housing.
- Request detailed water extraction and moisture monitoring logs from your restoration contractor.
For professional guidance during a plumbing crisis, refer to When the Levee Breaks: A Guide to Burst Pipe Emergency Help.
When to Call a Professional for Burst Pipe Repair
While a simple, exposed pipe can be a DIY project, you should always call a licensed professional for:
- In-Wall or Under-Floor Leaks: Pinpointing and accessing hidden leaks requires specialized acoustic detection, moisture meters, and professional tools to avoid unnecessary wall demolition.
- Main Line Breaks: Underground service line failures require heavy excavation equipment or advanced trenchless pipe bursting methods.
- Sewer Line Involvement: Category 3 “black water” leaks pose serious health risks and must be handled with specialized safety gear.
If your home has suddenly transformed into an indoor water park, do not wait. Read about After Hours Plumbing for When Your House Becomes a Pool.
Frequently Asked Questions about Burst Pipes
How much does burst pipe repair and water damage restoration typically cost?
The cost of fixing the actual broken pipe ranges from $150 to $600 for easily accessible lines, and $500 to $1,200 if the plumber has to cut through drywall or concrete to access the leak.
Water damage restoration costs are separate and depend on the scale of the flooding:
- Minor Cleanup (1 room, dry within 3 days): $800 to $2,500
- Moderate Cleanup (2-3 rooms, minor structural drying): $2,500 to $7,500
- Major Cleanup (Multi-room, multi-story, or mold remediation): $7,500 to $20,000+
How long does professional burst pipe repair typically take?
Once an emergency plumber arrives on-site, the physical burst pipe repair typically takes 2 to 4 hours to complete, including diagnostic testing. However, the structural drying and restoration process takes much longer — usually 3 to 5 days for complete drying, followed by 1 to 3 weeks for rebuilding drywall, paint, and flooring.
What are the best ways to prevent pipes from bursting during winter freezes?
Prevention is almost entirely in your control. Follow these steps during cold snaps:
- Insulate Exposed Pipes: Wrap vulnerable pipes in unheated basements, attics, crawlspaces, and garages with foam pipe sleeves.
- Maintain Stable Heat: Keep your home’s thermostat set no lower than 55°F (13°C), even when you are traveling.
- Let Faucets Drip: Allow a tiny, steady drip of cold water to run from faucets served by exterior-wall pipes. Moving water is much harder to freeze, and an open faucet relieves hydrostatic pressure if an ice plug does form.
- Disconnect Outdoor Hoses: Remove garden hoses from exterior spigots before the first freeze to allow the faucet to drain completely.
Conclusion
A burst pipe is a highly stressful home emergency, but reacting quickly and methodically keeps the damage to a minimum. By knowing how to shut off your water, relieve pressure, and when to call for professional reinforcement, you can protect your home, your family, and your wallet.
If you are dealing with a plumbing emergency right now, do not wait for the water to rise. We are here to help 24/7 with rapid call routing to experienced, local technicians in Austin, Denver, Indianapolis, and Phoenix.
Let us handle the pressure. Check out our guide on how to Stop the Flood with These Expert Emergency Plumbing Services or visit Plumbing Rescue Network to connect with a professional technician today.
Dealing With This Yourself? Talk to a Licensed Plumber.
Skip the guesswork — get a straight answer from a local pro. Available 24/7, no forms, no waiting.
Call Now: (888) 686-0698