

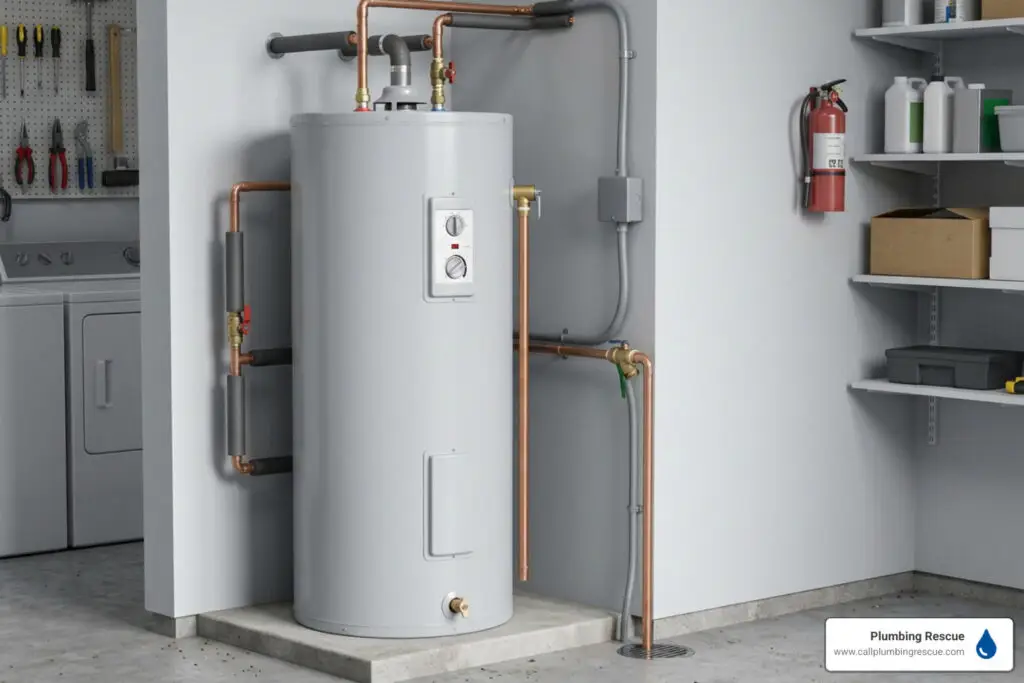
Why AO Smith Water Heater Maintenance Is Worth Your Time
AO Smith water heater maintenance is one of the simplest ways to avoid a cold-shower emergency — or worse, a flooded utility room.
Here’s a quick summary of the core annual tasks:
- Flush the tank to clear sediment buildup (more often in hard water areas)
- Test the T&P relief valve by lifting the lever briefly to confirm it opens and closes freely
- Inspect the anode rod and replace it if the core wire is exposed or the rod is significantly worn
- Check for leaks at all pipe connections and around the drain valve
- Adjust the thermostat to no higher than 120°F to prevent scalding and reduce energy waste
Most tank water heaters last 8–12 years. Skipping maintenance shortens that window fast. Sediment quietly builds at the bottom of the tank, forcing the heating element to work harder. The anode rod quietly corrodes until the tank lining is no longer protected. Small issues compound into expensive ones.
The good news? Most of these tasks take under an hour and require only basic tools. This guide walks you through each one clearly and safely.
I’m Ben Smith, a digital marketing and home services content strategist with over 25 years of experience helping homeowners navigate complex service topics — including AO Smith water heater maintenance and the plumbing decisions that come with it. With that background, I’ll help you cut through the noise and get to what actually matters for keeping your unit running well.

Ao smith water heater maintenance terms to remember:
The Core Benefits of Routine AO Smith Water Heater Maintenance
We like to think of water heater care much like an oil change for your car. You wouldn’t drive your vehicle across the country without checking the fluids and filters, so why expect your water heater to run 24/7 without a little attention? Taking the time to perform regular AO Smith water heater maintenance pays off in several key areas.
First, let’s talk about energy efficiency. As water is heated, minerals like calcium and magnesium naturally settle to the bottom of the tank. This creates a thick layer of sediment that acts as a thermal barrier. If you have an electric model, this sediment encrusts the heating elements; if you have a gas model, it insulates the bottom of the tank from the burner. Your system has to run longer and hotter just to heat the same amount of water, driving up your monthly utility bills. Keeping the tank clean ensures optimal heat transfer.
Second, routine care preserves your water quality and protects your health. Over time, heavy sediment buildup can dissolve back into your hot water supply, leading to cloudy, discolored, or foul-smelling water.
Third, safety is paramount. Water heaters operate under immense pressure. Key safety mechanisms, like the Temperature and Pressure (T&P) relief valve, prevent your water heater from turning into a rocket. Regular testing ensures these safety valves do not seize up from mineral deposits.
Finally, regular care dramatically extends your equipment lifespan. By keeping rust and sediment at bay, you avoid premature tank failure. If you want to dive deeper into how proactive care saves you from premature replacements, check out Your Wallet Will Love This Affordable Water Heater Replacement Guide. For official manufacturer recommendations, you can also review the Water Heater Maintenance Guide | A. O. Smith.
Step-by-Step Guide to Draining and Flushing Your Tank
Over time, tap water minerals form heavy lime deposits on heating elements and loose sediment at the bottom of the tank. If you live in a hard water area—which is incredibly common for our customers in Phoenix, AZ, and Austin, TX—this sediment accumulates rapidly.
When sediment builds up, you might hear strange rumbling, popping, or banging noises coming from your utility closet. This is steam bubbles struggling to escape from beneath the heavy layer of sediment.

To keep your system running quietly and efficiently, we recommend flushing the tank at least once per year. In areas with extremely hard water, you should increase this frequency to every six months.
| Water Hardness Level | Recommended Flushing Frequency | Key Indicator for Service |
|---|---|---|
| Soft Water (0-3 grains per gallon) | Once every 12 to 18 months | Slight drop in hot water volume |
| Moderate Water (3-7 grains per gallon) | Once every 12 months | Popping or ticking noises during heating cycles |
| Hard Water (7-10+ grains per gallon) | Once every 6 months | Milky water, popping noises, or reduced hot water duration |
For detailed specifications on gas systems, you can refer directly to the STANDARD RESIDENTIAL GAS WATER HEATER manual.
Preparing for AO Smith Water Heater Maintenance
Before you turn any valves, safety must come first. Water heaters hold a large volume of scalding water and are connected to high-voltage electricity or live gas lines. Follow these preparation steps carefully:
- Cut the Power: For electric water heaters, turn the circuit breaker to the “OFF” position. Working on an electric system with the power live can result in severe shock, and firing up dry elements will instantly burn them out. For gas water heaters, turn the gas control valve knob to the “PILOT” or “OFF” position.
- Let It Cool: Ideally, turn the system off a few hours before maintenance to let the water cool down. Draining 120°F+ water can easily cause severe, near-instantaneous second- or third-degree burns.
- Shut Off the Water: Locate the cold water inlet shutoff valve (usually marked with a blue handle on the pipe leading into the top of the tank) and turn it completely off.
- Gear Up: Wear safety goggles, heavy-duty gloves, and protective clothing to shield yourself from any unexpected hot water splashes.
Draining and Flushing the Tank
Once your system is safe and prepared, you can begin the flushing process:
- Connect the Hose: Attach a standard garden hose to the enhanced-flow brass drain valve located near the bottom of your AO Smith water heater.
- Route the Hose: Run the other end of the hose to a safe drainage location, such as a floor drain, a driveway, or a large utility sink. Ensure the drain can handle hot water without damage.
- Open a Hot Faucet: Open a hot water faucet on an upper floor of your home (or the kitchen sink). This introduces air into the plumbing system, breaking the vacuum and allowing the water to drain freely from the tank.
- Open the Drain Valve: Use a flathead screwdriver or turn the handwheel to open the drain valve. Water will begin flowing through the hose.
- Flush the Tank: Once the tank is empty, turn the cold water inlet valve back on in short, 15-second bursts. This “mini-flush” sends pressurized cold water swirling across the bottom of the tank, loosening stubborn sediment. Repeat this until the water exiting the hose runs completely clear.
- Close and Refill: Close the drain valve, disconnect the hose, and turn the cold water inlet valve completely back on to refill the tank. Keep the hot water faucet inside your home open until water flows in a steady stream without sputtering air. Crucial step: Never turn the power or gas back on until the tank is completely full of water!
If you run into any common hiccups during this process, read through our troubleshooting tips on Common Water Heater Problems And How To Solve Them.
Inspecting, Replacing, and Adjusting Key Components
Beyond flushing, several mechanical parts require regular checkups to prevent leaks, thermal expansion damage, or tank corrosion.
Checking the Sacrificial Anode Rod
The sacrificial anode rod is your water heater’s unsung hero. It is a long metal rod—typically made of magnesium, aluminum, or zinc alloys—screwed into the top of the tank. Its sole job is to corrode so your steel tank doesn’t. Because the anode rod is more chemically active than the steel of the tank, corrosive elements in the water attack the rod first.
Most experts recommend inspecting the anode rod after the first six months, then annually. If you use a water softener, pay close attention: water softeners greatly increase the corrosive effects of water, reducing the lifespan of your anode rod significantly.
To inspect or replace the rod:
- Turn off the power and water supply, and drain a few gallons of water to lower the water level below the top of the tank.
- Locate the hex head of the anode rod on top of the tank (you may need a 1 1/16-inch socket wrench).
- Unscrew the rod and carefully pull it straight up. If your ceiling clearance is tight, AO Smith offers segmented anode rods that bend to fit restrictive spaces.
- Inspect the rod. If the core wire is exposed, the rod’s diameter is significantly reduced, or it is covered in heavy lime scale, it is time for a replacement. AO Smith’s patented CoreGard stainless steel core anode rods offer extended tank protection.
For more advice on choosing the right replacement parts or systems, check out How To Find An Affordable Water Heater For Your Home.
Testing the Temperature and Pressure (T&P) Relief Valve
The T&P relief valve is a critical safety device designed to release water if the temperature or pressure inside the tank exceeds safe limits (typically 150 psi or 210°F).
You should test this valve at least once per year:
- Ensure the discharge pipe attached to the T&P valve is properly directed toward a floor drain or safety pan.
- Lift the trip lever on the valve for a few seconds. Water should flow freely out of the discharge pipe.
- Release the lever. The valve should snap shut and stop dripping immediately.
If the valve continues to drip, or if it is stuck and won’t open, it must be replaced immediately. A dripping T&P valve can also indicate a closed plumbing system experiencing high water pressure from thermal expansion. If this is the case, installing a thermal expansion tank is required to protect your plumbing. Have a professional inspect the T&P valve at least once every 5 years to guarantee safe operation.
Troubleshooting Common Issues During AO Smith Water Heater Maintenance
Even with careful maintenance, minor issues can pop up. Let’s look at how to address them:
- Insufficient Hot Water: If you are running out of hot water too quickly, check your thermostat settings. On electric models, a failed lower heating element is often the culprit (you can check element resistance with a multimeter; a good element should read between 5 and 25 ohms).
- Leaks and Drips: Don’t assume a puddle means your tank is ruined. Check the threaded connections at the hot and cold inlets first. If the drain valve is dripping, verify it is completely closed or replace the washer.
- Thermostat Adjustment: To adjust the temperature on your AO Smith water heater, locate the thermostat dial. On gas models, this is a visible dial on the front of the gas control valve. On electric models, you must remove the access panels on the side of the tank (after turning off the power!) and use a flathead screwdriver to adjust the dials. We recommend setting the thermostat to 120°F to strike the perfect balance between comfort, energy savings, and scald prevention.
For affordable repair options if you hit a roadblock, see our guide on how to Fix Your Tank For Less With Affordable Water Heater Repair.
Tank-Style vs. Tankless Maintenance Differences
If you have upgraded to an AO Smith tankless water heater, your maintenance routine will look a bit different. Tankless systems do not store water, meaning they do not collect loose sediment in the same way a tank does. However, they are highly susceptible to mineral scale buildup inside the narrow passages of the heat exchanger.
Instead of a simple flush, tankless units require an annual descaling process. This involves circulating a food-grade descaling solution (or pure white vinegar) through the heat exchanger using a small utility pump connected to service valves. Additionally, tankless owners must regularly clean the water inlet filter to keep it free of debris and inspect the air intake vents.
For hybrid heat pump models, remember to clean the air filter when the “SF” code appears on your screen and regularly clean the condensate drain line. You can find more detail on specialty systems in the Routine Maintenance instructions.
Frequently Asked Questions About AO Smith Water Heaters
How often should I flush my AO Smith water heater?
Most homeowners should flush their water heater at least once per year. However, if you live in a hard water area—such as Austin, TX, or Phoenix, AZ—mineral deposits accumulate much faster. In these regions, we highly recommend flushing the tank every six months to maintain peak efficiency and prevent loud popping noises.
What are the signs that my anode rod needs to be replaced?
You should replace your sacrificial anode rod if you notice:
- The steel core wire is exposed.
- The rod’s thickness has decreased by more than 75%.
- Your hot water has a sudden “rotten egg” smell (often caused by bacteria reacting with a degraded magnesium rod).
- You notice rusty or discolored hot water. If you use a water softener, check the rod annually, as softened water accelerates anode depletion.
Where can I find official AO Smith manuals and warranty information?
AO Smith makes finding documentation incredibly easy. Newer models feature a convenient QR code on the rating plate. Simply scan this code with your smartphone camera to instantly access your model-specific user manual, check your warranty status, find exact replacement parts, or connect with a virtual remote assistant.
If your unit doesn’t have a QR code, you can search using your serial and model numbers on the Water Heater Warranty Repair Service Near Me | A. O. Smith portal.
Conclusion
Taking care of your AO Smith water heater doesn’t have to be a stressful chore. By spending less than an hour each year flushing sediment, checking the anode rod, and testing the T&P safety valve, you will enjoy lower energy bills, consistent hot water, and a system that lasts for years to come. Plus, if you are looking to make your home even more energy-efficient, keep in mind that certain upgrades may qualify you for financial incentives. Learn more about these opportunities in our guide to Water Heater Options Tax Credits.
Of course, we know that DIY plumbing isn’t for everyone. If you run into a stuck valve, a clogged drain, or simply prefer to leave the technical work to the experts, we are here to help.
At Plumbing Rescue, we provide 24/7 emergency plumbing services across the United States—including Austin, TX, Denver, CO, Indianapolis, IN, and Phoenix, AZ. Our rapid call routing connects you to local, highly trained technicians day or night for urgent leak fixes, water heater repairs, and preventative maintenance.
Ready to schedule your annual service or need emergency help? Contact us today through the Plumbing Rescue Network and let us take the hassle out of your home comfort!
Dealing With This Yourself? Talk to a Licensed Plumber.
Skip the guesswork — get a straight answer from a local pro. Available 24/7, no forms, no waiting.
Call Now: (888) 686-0698
