
Prevent Disastrous Bathroom Floods with These Quick Clog Fixes
Emergency Steps to Halt a Commode Water Overflow Immediately
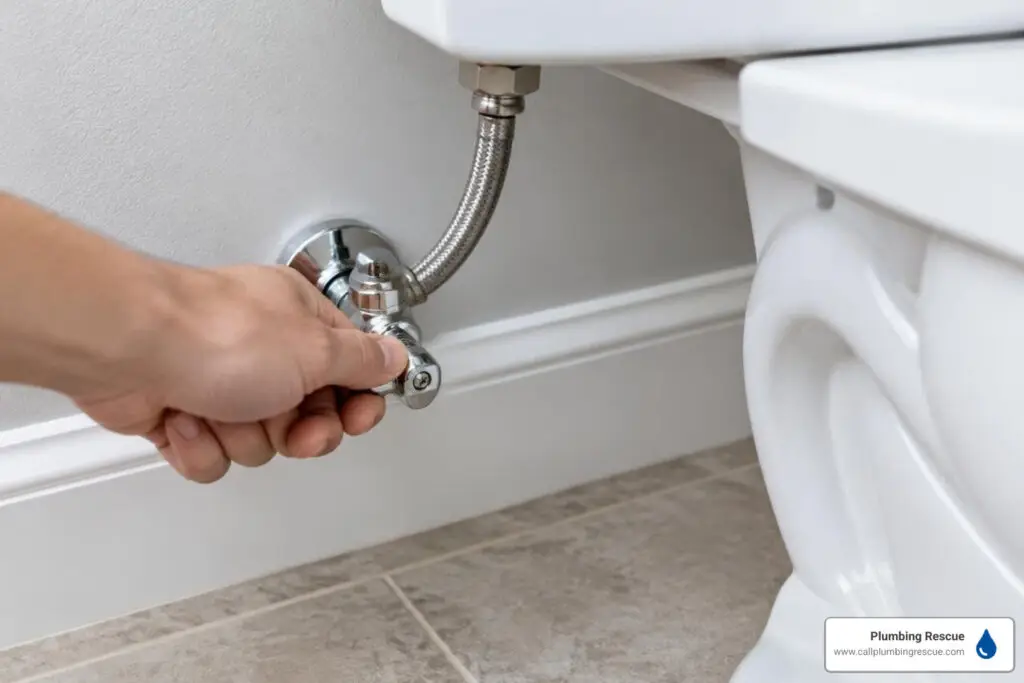
To stop a commode water overflow immediately, turn the angle stop valve behind the toilet clockwise until it stops, or remove the tank lid and lift the float ball or float cup to shut off incoming water. If the flush is still running, push the flapper down against the valve seat to seal the tank opening. Taking these steps first prevents standing water from seeping into baseboards, tile grout, and the structural subfloor beneath your fixture.
If you ever encounter wider household flooding, our emergency water leak guide walks through whole-house shutoff procedures, but for an isolated toilet emergency, you can resolve the issue right at the fixture.
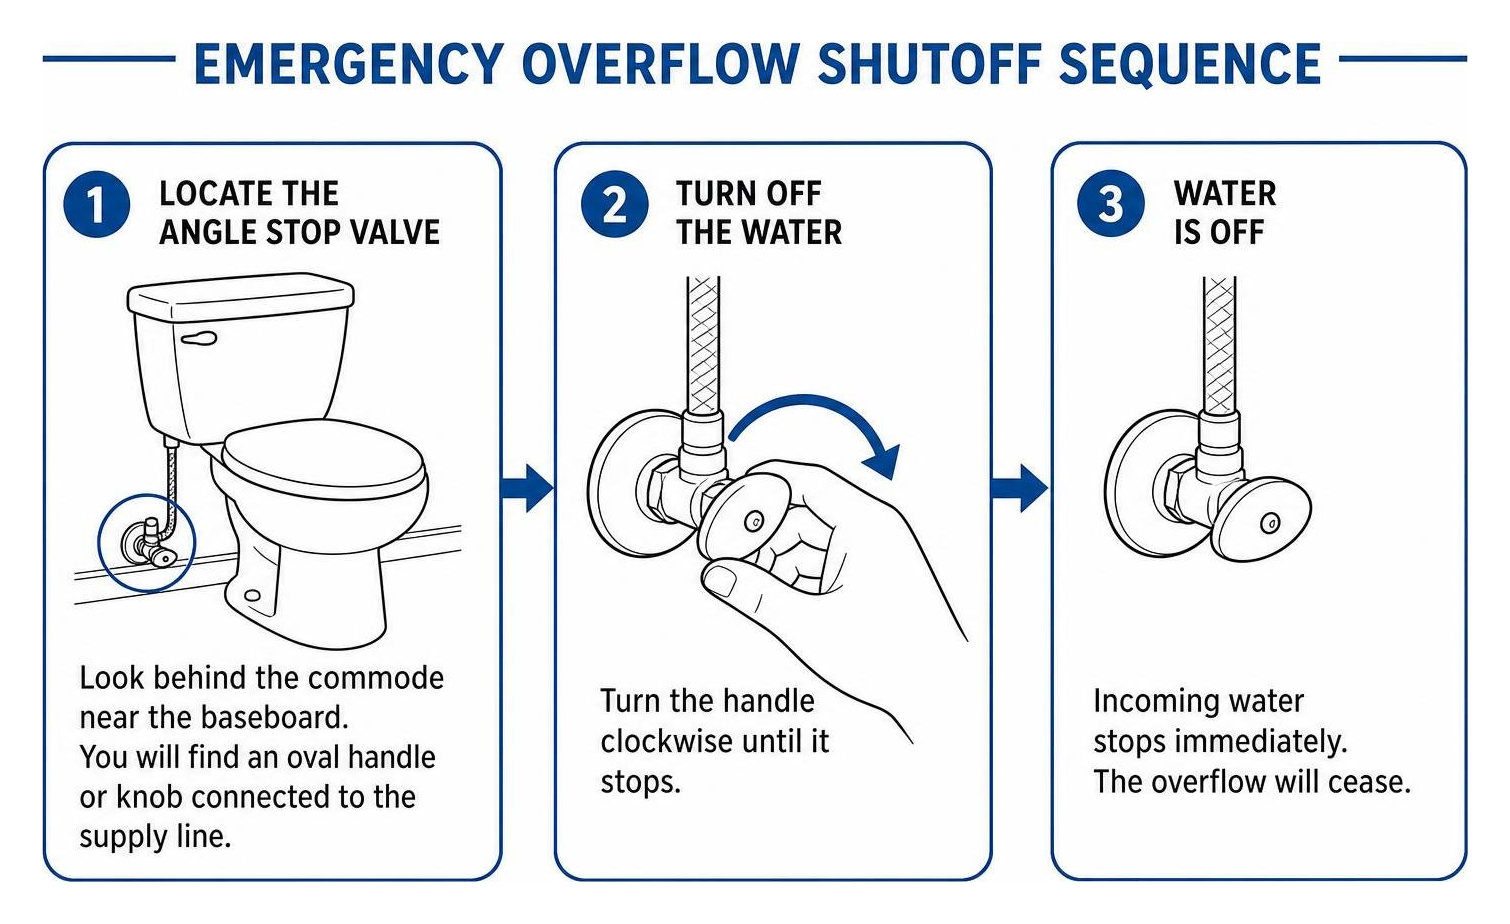
How to Safely Shut Off the Water Supply
To stop incoming water instantly, follow these steps:
- Locate the Angle Stop Valve: Look behind the commode near the baseboard. You will find an oval handle or knob connected to the flexible metal supply line.
- Turn It Clockwise: Rotate the handle clockwise until it stops completely. This cuts off fresh water entering the tank reservoir.
- Lift the Tank Float Manually: If the angle stop valve is frozen from mineral deposits or hard water, remove the tank lid and set it flat on a towel. Reach in and manually pull the float ball or float cup all the way to the top. This tricks the fill valve into thinking the tank is full, shutting off the water stream immediately while you work.
- Push Down the Flapper: If the flush cycle is still running and sending tank water into an already full bowl, push the rubber flapper at the bottom of the tank down against its valve seat to seal the opening.
Essential Tools to Fix a Commode Water Overflow
Having the right gear on hand prevents secondary damage and protects you from bacteria:
- Flanged Plunger (Toilet Plunger): Unlike standard flat sink plungers, a toilet plunger features an extended rubber horn or flange designed to create an airtight seal inside the curved bowl opening.
- Toilet Closet Auger: A heavy-duty snake with a protective rubber or plastic sleeve that snakes through the curved porcelain trapway without scratching the glaze.
- Heavy-Duty Rubber Gloves: Essential for sanitation when handling toilet water and tank components.
- Large Bucket and Heavy Towels: To contain standing water and catch spills during drain clearance.
- Adjustable Wrench & Screwdrivers: For valve adjustments, bolt tightening, and tank maintenance.
Step-by-Step Guide to Clearing Clogs and Restoring Drainage
Once the water supply is halted, your next priority is clearing whatever obstruction is choking the siphon jet or curved trapway. Applying pro toilet unclogging tips will clear standard blockages quickly and safely.
Effective Plunging Techniques for Near-Drain Blockages
Plunging is the most effective initial DIY remedy when done correctly.
- Ensure there is enough water in the bowl to cover the head of the plunger. If the bowl is empty, add a small bucket of water; if it is dangerously full, bail some into a bucket first.
- Insert the plunger at a 45-degree angle so the cup fills with water rather than trapped air (compressing air absorbs energy, while water transfers pressure directly to the clog).
- Seat the extended rubber flange firmly into the bottom drain hole to establish a tight vacuum seal.
- Push and pull vigorously straight up and down for 15 to 20 seconds, maintaining the seal throughout. The downward stroke pushes against the clog, while the upward stroke uses suction to break the blockage apart.
- Pull the plunger away sharply. If the water drains out with a swift whoosh, the blockage has cleared.
For minor organic clogs, you can also unblock a toilet using baking soda and vinegar as an eco-friendly chemical-free alternative before plunging.
Using a Toilet Auger for Deep Traps and Obstructions
If plunging fails to budge the obstruction, the clog is likely lodged deeper in the S-trap or fixture drain line.
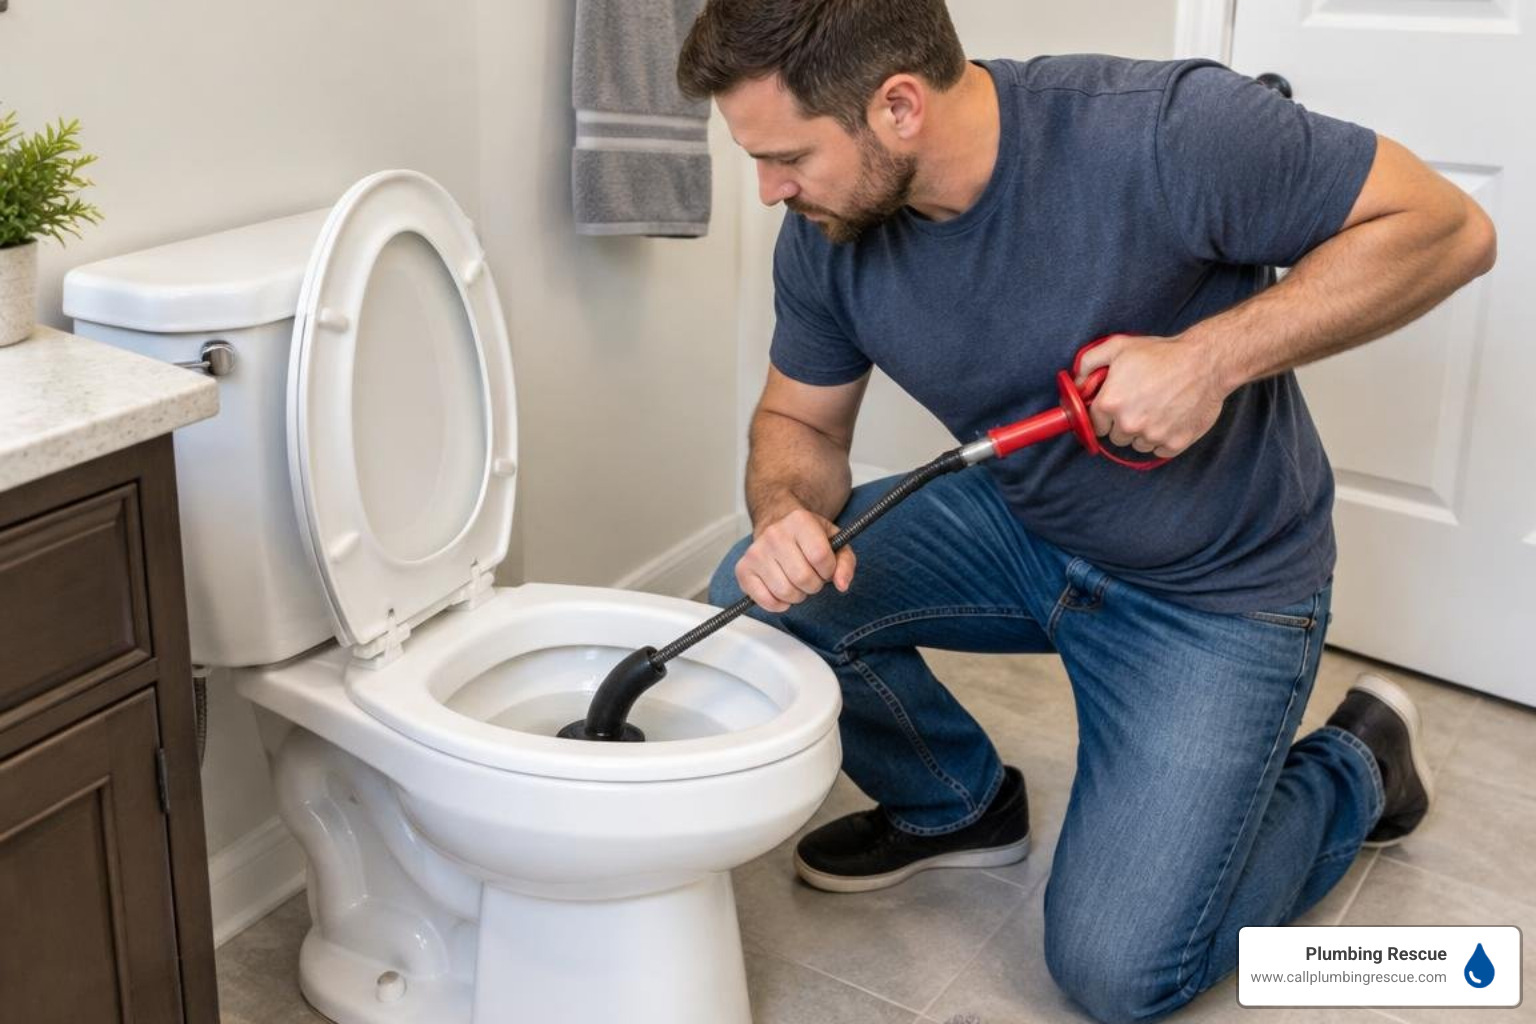
- Retract the auger cable fully into the protective guide tube so the metal coil rests just inside the bottom elbow.
- Place the curved rubber elbow into the bowl drain hole pointing upward into the trap. The protective sleeve keeps the metal cable from scarring your porcelain bowl.
- Crank the handle clockwise with steady, moderate downward pressure to feed the flexible spring cable through the trapway bends.
- When you encounter resistance, rotate the crank several times to snag the obstruction or break it apart.
- Carefully pull the auger back out while continuing to rotate the handle clockwise to retrieve the debris.
- Once cleared, turn your water supply valve counterclockwise half a turn to perform a test flush.
Adjusting Internal Tank Mechanics to Prevent Future Spills
A commode can overflow even without an active bowl clog if the tank’s internal water controls fail. Understanding why your toilet always breaks at night often comes down to rising municipal water pressure pushing past worn valves and degraded seals when household water use drops.
A silent internal leak can waste over 200 gallons of water daily, running up utility bills and placing continuous strain on overflow components.
Diagnosing Float and Fill Valve Faults
The fill valve controls the volume of water entering the tank after every flush, while the float regulates when that valve shuts off. If the float is calibrated too high or the fill valve diaphragm fails to seal, excess water constantly pours into the open overflow tube.
- Checking Water Level: Remove the tank lid and check the water line. The static water line should sit between 0.5 and 1 inch below the top rim of the overflow tube.
- Adjusting Modern Fill Valves: On newer vertical cylinder valves, locate the plastic adjustment screw along the float arm. Turn the screw counterclockwise with a flathead screwdriver to lower the float height.
- Adjusting Traditional Float Balls: If you have an older brass or copper rod with a floating bulb, support the base of the arm and gently bend the rod slightly downward to lower the shutoff point.
- Testing the Calibration: Flush the toilet and observe where the water stops filling. If it still breaches the overflow tube, the fill valve diaphragm is likely calcified or torn and needs replacement.
Replacing a Faulty Flapper Valve and Chain Mechanism
Over 80% of phantom flushes and run-on issues stem from a deteriorated rubber flapper. When the flapper fails to seal against the flush valve seat, water constantly leaks into the bowl, forcing the fill valve to cycle on repeatedly.
- Perform a Quick Dye Test: Add 5 to 6 drops of dark food coloring into the tank reservoir. Wait 15 to 20 minutes without flushing. If colored water seeps into the bowl, your flapper seal is failing.
- Turn Off Water & Drain: Shut off the angle stop and hold the flush handle down to drain the tank completely. Sponge out the remaining puddle at the bottom.
- Inspect the Chain Slack: The lift chain connecting the trip lever to the flapper should have approximately 1/2 inch of slack. A chain that is too tight props the flapper open; a chain that is too loose gets wedged beneath the seal.
- Swap the Flapper: Unhook the old flapper from the mounting ears on the overflow tube, unclip the chain from the trip lever, and wipe the valve seat clean of mineral sediment. Snap the new rubber flapper into place and adjust the chain length.
Installing a Mechanical Commode Shutoff Device for Tank Security
For advanced home protection against fill-valve malfunctions, mechanical divert-and-shut mechanisms provide automatic safeguards. The patented Commode shutoff device operates as an ingenious plumbing stop-sign: when an overfill occurs or the flush handle is pulled upward, the device actuates an internal diverter valve arm.
This diverter redirects excess water away from the standard overflow path and routes it across an alternate line directly over the flush valve. The redirected flow forces the flapper closed and cuts off bowl refill, neutralizing tank-to-bowl overflows mechanically without relying on fragile electrical sensors.
Resolving Base Leaks, Flange Damage, and Wax Ring Failures
Not all overflows spill over the porcelain rim. External leaks appearing around the toilet base during or immediately following a flush indicate a breach between the toilet horn and the waste pipe flange.
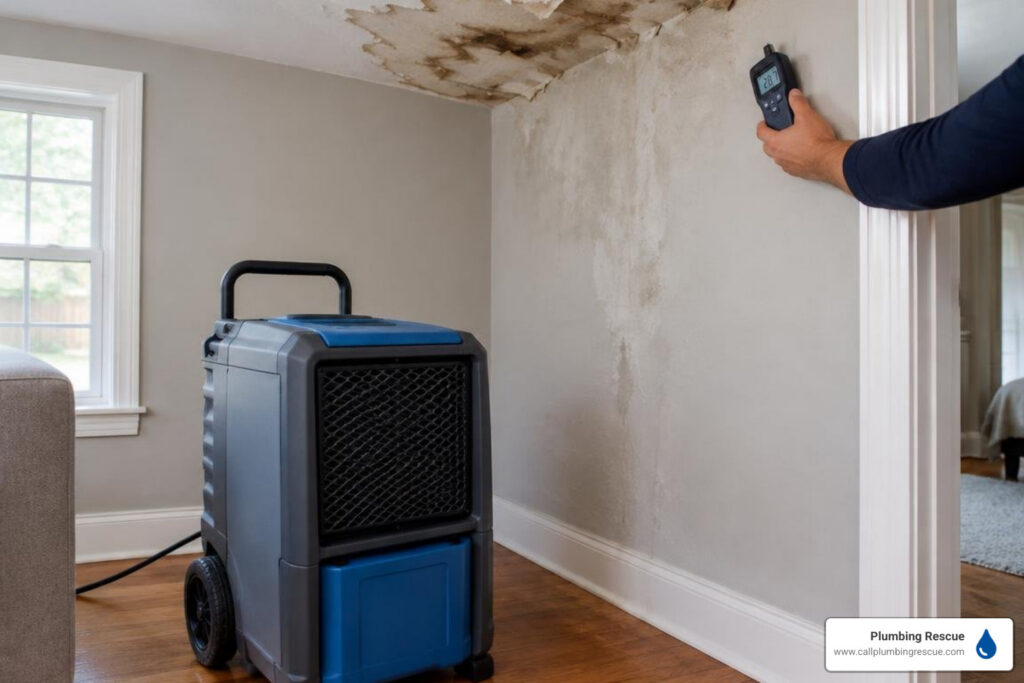
External leaks are far more urgent than internal running leaks because seeping wastewater rots floor joists, ruins underlayment, and creates hazardous structural mold in the ceiling cavities below.
A leak that occurs exclusively during the flush cycle typically points to a failed wax ring or a hairline fracture in the closet flange. When the toilet discharges, water is forced past the compressed seal and onto your finished floor.
| Seal Type | Pros | Cons | Best Application |
|---|---|---|---|
| Traditional Wax Ring | Molds perfectly to uneven surfaces; highly economical; proven durability. | Single-use only; melts in high-heat storage; compresses permanently if toilet shifts. | Standard residential installations on level floors. |
| Rubber / Foam Gasket Seal | Repositionable during install; mess-free; accommodates minor toilet rocking without breaking seal. | Higher initial cost; requires precise flange height alignment to seal properly. | DIY installations and uneven tile floors. |
Steps to Replace a Failed Wax Ring:
- Shut off the angle stop, flush the toilet, and bail out all remaining water from the bowl and tank.
- Disconnect the flexible supply line using an adjustable wrench.
- Pry off the decorative bolt caps at the base and remove the closet nuts.
- Carefully lift the toilet fixture vertically and set it onto an old moving blanket or cardboard.
- Scrape away the old wax residue completely from both the toilet horn and the closet flange using a putty knife.
- Inspect the closet flange. If the PVC or cast iron flange is cracked, install a metal reinforcement spanner ring before continuing.
- Place the new wax ring (with built-in plastic horn) firmly onto the closet flange.
- Lower the commode straight down over the new bolts. Apply firm, downward body weight to crush and seat the seal.
- Tighten the closet bolts to hand-tight, then add a maximum of one-quarter turn with a wrench. Excessive torque will crack the porcelain base, ruining the fixture.
Proactive Maintenance Strategies for Long-Term Prevention
Routine preventive care prevents emergency overflows before they start:
- Keep Chemicals Out of the Tank: Avoid dropping blue chlorine pucks or chemical drop-in tablets into the tank. Concentrated bleach degrades rubber flappers, fill valve seals, and plastic mounting nuts within months.
- Inspect the Roof Vent Stack: A blocked plumbing vent creates negative air pressure in your drain pipes. If your commode gurgles when a nearby sink drains, inspect your rooftop vent for leaves, debris, or bird nests.
- Clean Rim Jets Periodically: Mineral deposits and scale buildup in the under-rim siphon jets weaken the flush velocity, increasing clog risk. Clean these small openings with distilled white vinegar and a small wire brush.
- Watch for Whole-Home Symptoms: If you notice all toilets backed up or water rising up through bathtubs when you flush, the blockage is in your main sewer lateral, requiring immediate main-line clearing.
Frequently Asked Questions About Commode Overflows
Why does my toilet leak exclusively when flushed?
A leak that occurs exclusively during the flush cycle typically indicates a failed wax ring or a hairline crack in the closet flange. During the flush, gallons of water exit the bowl simultaneously. If the airtight, watertight seal between the toilet horn and the closet flange is compromised, the surging discharge escapes across the floor.
Can silicone sealant replace a failed toilet wax ring?
No. Silicone sealant cannot replace a wax ring or a specialized rubber gasket when sealing the toilet horn to the waste pipe. Silicone lacks the compressive volume required to bridge the gap between the toilet horn and the floor flange. Silicone should only be used around the outer base rim of the toilet on the finished floor for cosmetic caulking, leaving the back uncaulked to expose any future hidden leaks.
When should I call an emergency plumber instead of attempting DIY?
While basic trap clogs and float height adjustments are manageable DIY tasks, certain critical signs demand immediate professional intervention:
- Multiple fixtures backing up simultaneously across your home.
- Standing water leaking through downstairs ceilings or warping subfloors.
- Recurring overflows despite thorough plunging and augering.
- Hairline cracks or fractures in the porcelain bowl or tank reservoir.
If you discover a crack in the porcelain bowl or tank itself, replacement of the entire unit is the only safe long-term solution. Our 24-hour plumber guide outlines what to expect when calling out a certified technician for round-the-clock emergency assistance.
Conclusion
A commode water overflow is an urgent plumbing emergency that requires immediate intervention to stop water flow, clear blockages, and safeguard your home’s structural framing. By mastering quick shutoff techniques, maintaining proper tank calibration, and replacing worn seals, you can resolve minor issues before they turn into costly water restoration projects.
When DIY fixes are not enough or your drainage lines are severely compromised, reach out to our team at Plumbing Rescue. We provide rapid 24/7 emergency dispatch to protect your home day or night in Austin, TX, Denver, CO, Indianapolis, IN, and Phoenix, AZ.
Dealing With This Yourself? Get Connected With a Local Plumber.
Skip the guesswork — one call connects you with a local plumbing provider. Available 24/7, no forms.
Call Now: (888) 686-0698