
Essential Safety Precautions and Diagnostic Tools
Before attempting any bajaj geyser repairing tasks, working with high-voltage electricity and pressurized hot water requires strict adherence to safety protocols. A standard domestic electric geyser operates at 220–240 volts, which can cause severe electric shock if handled improperly.
Always follow this step-by-step process before opening the appliance cover panel:
- Isolate Power Supply: Switch off the dedicated Miniature Circuit Breaker (MCB) at your home’s main distribution board and unplug the unit from the wall socket.
- Verify Power Loss: Use a non-contact voltage tester or a multimeter on the inlet terminals to confirm that no live electrical current is reaching the water heater.
- Relieve Tank Pressure: Shut off the cold water inlet valve. Open a hot water faucet inside the home to release trapped pressure inside the tank, and let the unit cool down completely before touch-testing or draining.
- Wear Protective Gear: Put on rubber-insulated gloves and dry shoes to prevent accidental grounding while testing live-line connections.
If you are dealing with broader water heating issues across different brands or unit types, understanding common water heater problems and how to solve them provides useful structural context for safe DIY inspection.
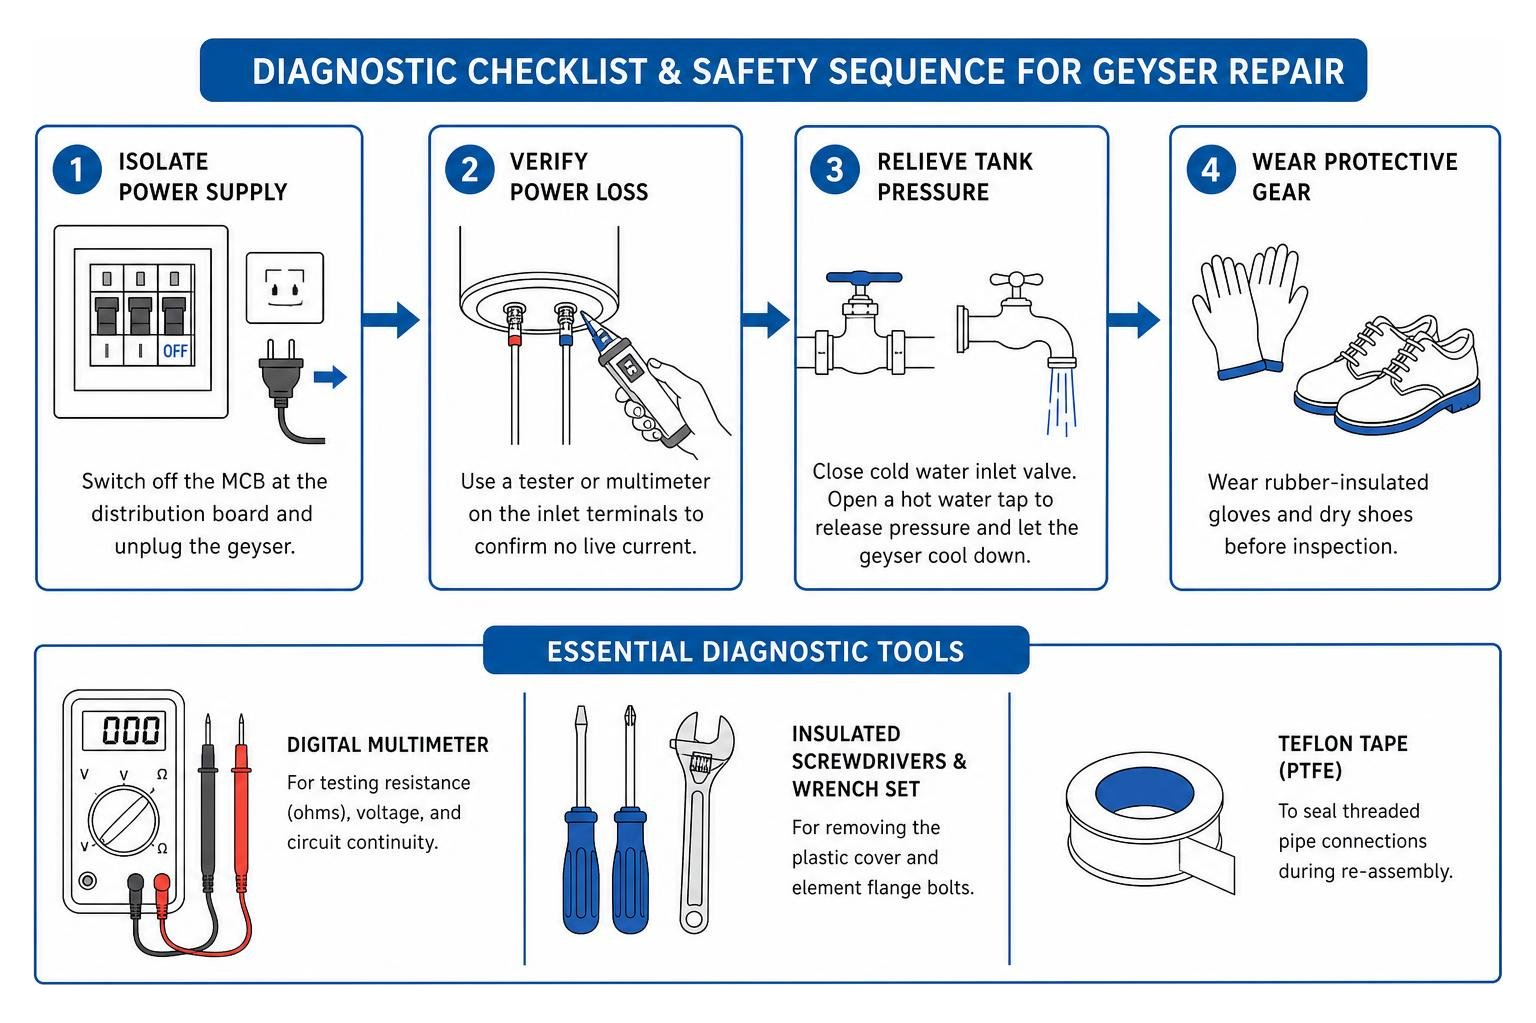
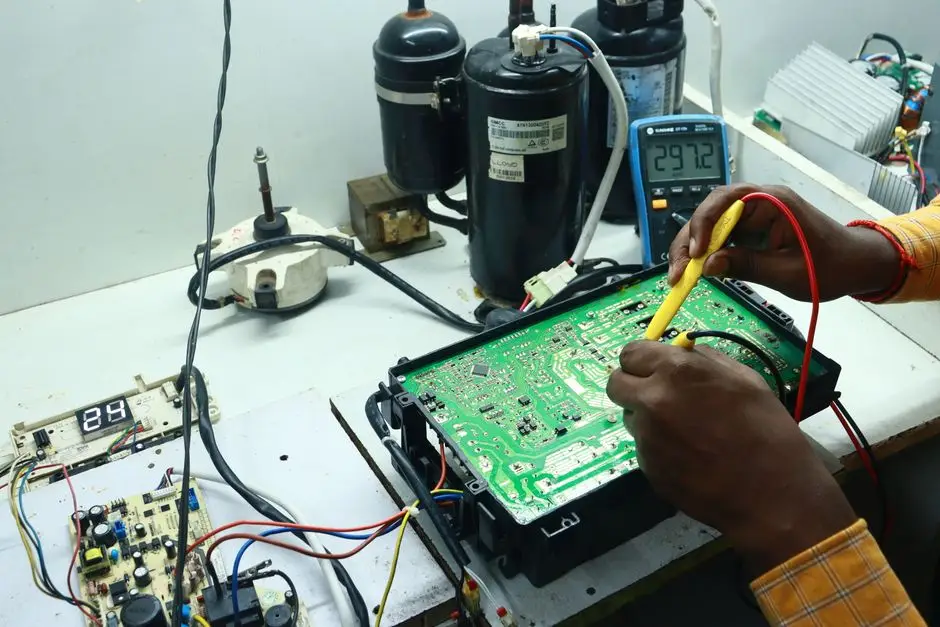
To diagnose electrical faults accurately during bajaj geyser repairing, keep these basic tools ready in your toolkit:
- Digital Multimeter: For testing resistance (ohms), voltage, and circuit continuity.
- Insulated Screwdrivers & Wrench Set: For removing the plastic cover and element flange bolts.
- Teflon Tape (PTFE): To seal threaded pipe connections during re-assembly.
- Cleaning Bucket & Hose: To drain sediment safely without spilling water onto open wiring.
Step-by-Step DIY Bajaj Geyser Repairing for Common Issues
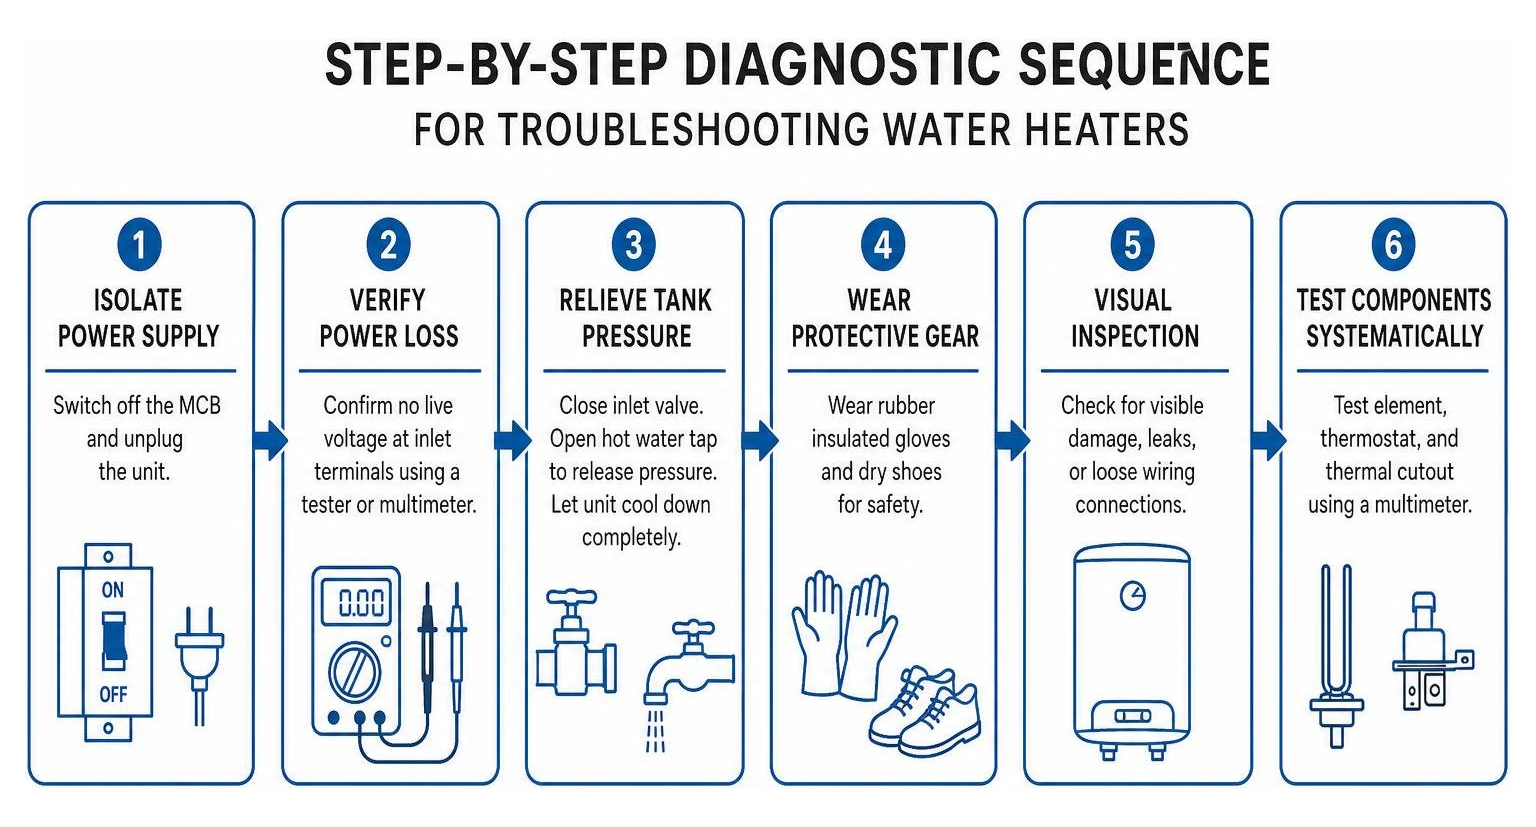
When a geyser stops functioning normally, working through a structured troubleshooting process helps isolate whether the fault lies in the heating element, control thermostat, thermal safety cutout, or plumbing fittings.
Bajaj Geyser Repairing: Heating Element Replacement
The heating element is the core component that converts electrical energy into heat inside the storage tank. Hard water mineral accumulation often forms a thick insulating crust over the sheath, causing localized thermal runaway and ultimate burnout.
If your appliance light turns on but fails to heat water, test the element using a digital multimeter set to measure resistance (Ohms):
- Standard Resistance Target: A healthy Bajaj heating element typically measures between 20 and 40 ohms.
- Open Circuit (OL): A reading of “OL” or infinite resistance means the internal filament has snapped and requires total element replacement.
- Ground Fault Test: Measure continuity between one element terminal and the bare metal heating flange. Any continuity reading indicates an internal earth short that will trip your home’s MCB instantly.

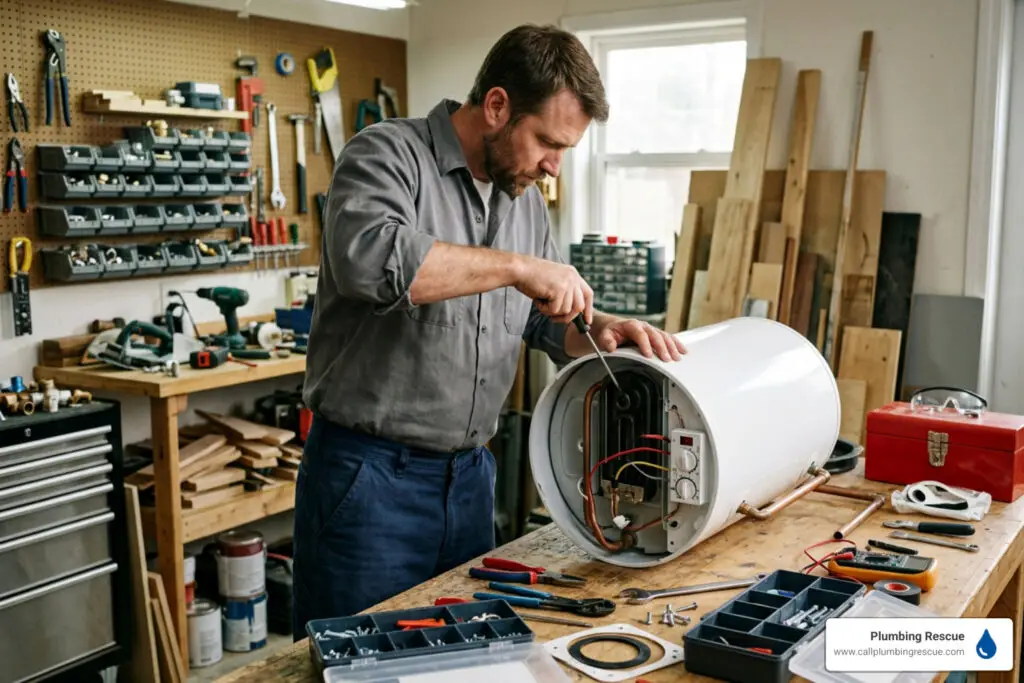
To replace a failed element, review this detailed How to Repair Bajaj Geyser Guide:
- Drain the water heater tank completely after shutting off the power and water supply.
- Remove the plastic bottom cover to access the wiring harness. Label or take a photo of the wire configurations before disconnecting them from the heating element terminals.
- Unscrew the mounting flange bolts using a socket wrench.
- Extract the old heating element and clean out loose mineral sediment accumulating near the bottom of the inner tank.
- Place a brand-new rubber flange gasket over the replacement element to prevent leaks.
- Slide the new element inside, tightening the flange bolts evenly in a star pattern to balance gasket pressure.
- Refill the tank with water before switching the power back on to prevent dry-burning the new element.
Testing Thermostats and Thermal Cutouts
Bajaj water heaters utilize two safety temperature devices working in tandem: a primary adjustable thermostat (which regulates operating temperatures between 30°C and 75°C) and a high-limit thermal cutout switch designed to cut power if water exceeds safe limits.
If the high-limit switch trips, the geyser may appear completely “dead” with no indicator lights illuminated. To verify thermostat operation, consult The Quick Guide to AO Smith Lower Thermostat Replacement for similar high-limit and thermostatic control principles.
- Testing Continuity: Disconnect power, set your multimeter to resistance mode, and check across the thermostat terminals. If the water inside the tank is cold, the thermostat contacts should show zero resistance (full continuity).
- Thermal Cutout Reset: Locate the small red or black reset button mounted directly on the thermostat body under the lower panel. Firmly press the button until you hear an audible click to reset the unit after an overheating event.
Bajaj Geyser Repairing for Water Leakage and Valve Faults
Water dripping from a water heater can originate from several locations:
- Multi-Function Safety Valve (MFV): This valve operates as both a non-return valve and a pressure release valve. Minor dripping from the drain spout during active heating cycles is normal, as water expands when heated. However, continuous heavy leaking indicates excessive internal pressure or grit stuck inside the valve seat.
- Inlet/Outlet Pipe Fittings: Dripping at pipe connections usually stems from worn Teflon tape or loose rubber washers. Tighten the fittings with an adjustable spanner or re-wrap threads using fresh PTFE tape.
- Inner Steel Tank Leakage: Corrosion from untreated hard water can pierce the glass-lined or stainless-steel inner tank shell over time. Internal tank leaks cannot be safely patched; if the inner vessel fails, the complete water heater must be replaced.
If you encounter persistent structural leaks, seeking expert local guidance can help you determine whether part replacement or full appliance renewal is necessary.
Preventive Maintenance, Descaling, and Service Schedules
Mineral scale accumulation is the primary cause of premature component failure in domestic geysers. Dissolved calcium and magnesium ions precipitate out of solution when heated, settling at the bottom of the storage tank as hard sediment.
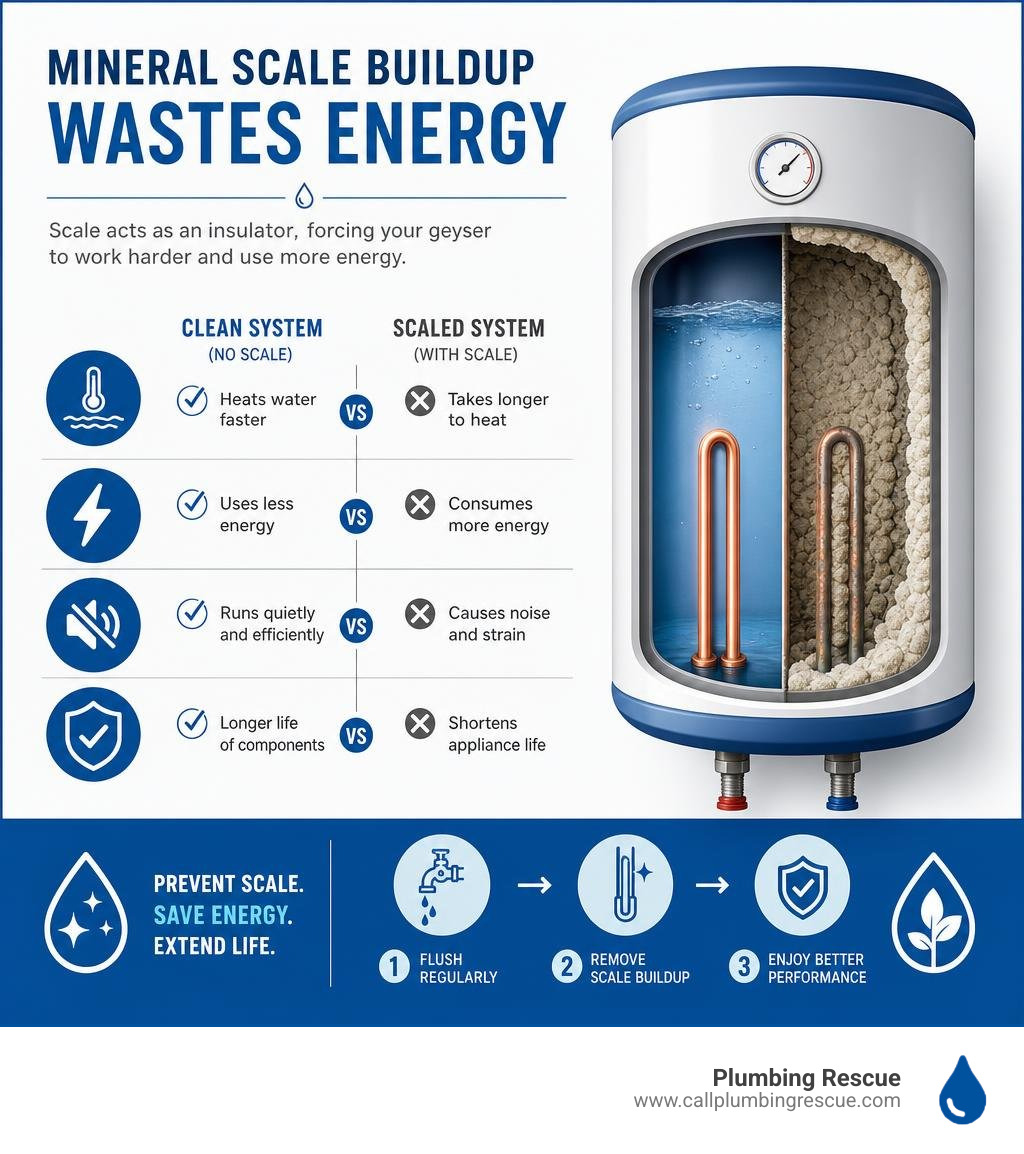
Benefits of regular flushing and descaling include:
- Faster Heat Transfer: Removing limescale allows direct heat transmission into the water, cutting recovery times significantly.
- Reduced Noise: Eliminates popping, crackling, or hissing sounds caused by trapped steam bubbles expanding under hard sediment layers.
- Corrosion Protection: Most storage geysers feature a sacrificial magnesium anode rod that attracts corrosive elements, protecting the inner tank lining. Checking and replacing this anode rod every 1–2 years extends tank life drastically.
| Geyser Type | Descaling Frequency | Key Maintenance Tasks | Recommended Height |
|---|---|---|---|
| Instant Geyser (1L–3L) | Every 18–24 Months | Flush heat exchanger, inspect multi-function valve, verify earth grounding | Min. 1.8 meters (6 feet) |
| Storage Geyser (10L–25L) | Every 12–18 Months | Drain tank sediment, test/replace sacrificial anode rod, check heating element ohms | Min. 1.8 meters (6 feet) |
To descale your storage geyser tank manually:
- Disconnect electricity and drain all water from the storage tank using the outlet line or safety valve drain spout.
- Mix a non-corrosive descaling liquid or standard household white vinegar solution and pump or siphon it into the tank through the cold inlet pipe.
- Allow the solution to react for 2–3 hours to dissolve calcium carbonate deposits on the heating element.
- Flush the inner tank thoroughly with clean water until all loosened scale fragments exit the drain port.
Cost Breakdown and Hiring a Professional vs DIY
Deciding whether to perform bajaj geyser repairing yourself or hire a qualified technician comes down to safety comfort levels, tool availability, and component complexity. Basic plumbing washers or manual thermal cutout resets are often handled by confident DIYers, whereas internal wiring faults, tank replacements, and element testing are best left to trained technicians.
For U.S. homeowners, including customers in Plumbing Rescue service areas such as Austin, Denver, Indianapolis, and Phoenix, pricing varies by local labor rates, appliance accessibility, and whether Bajaj-specific replacement parts are readily available. Typical water heater service rates often fall within these general ranges:
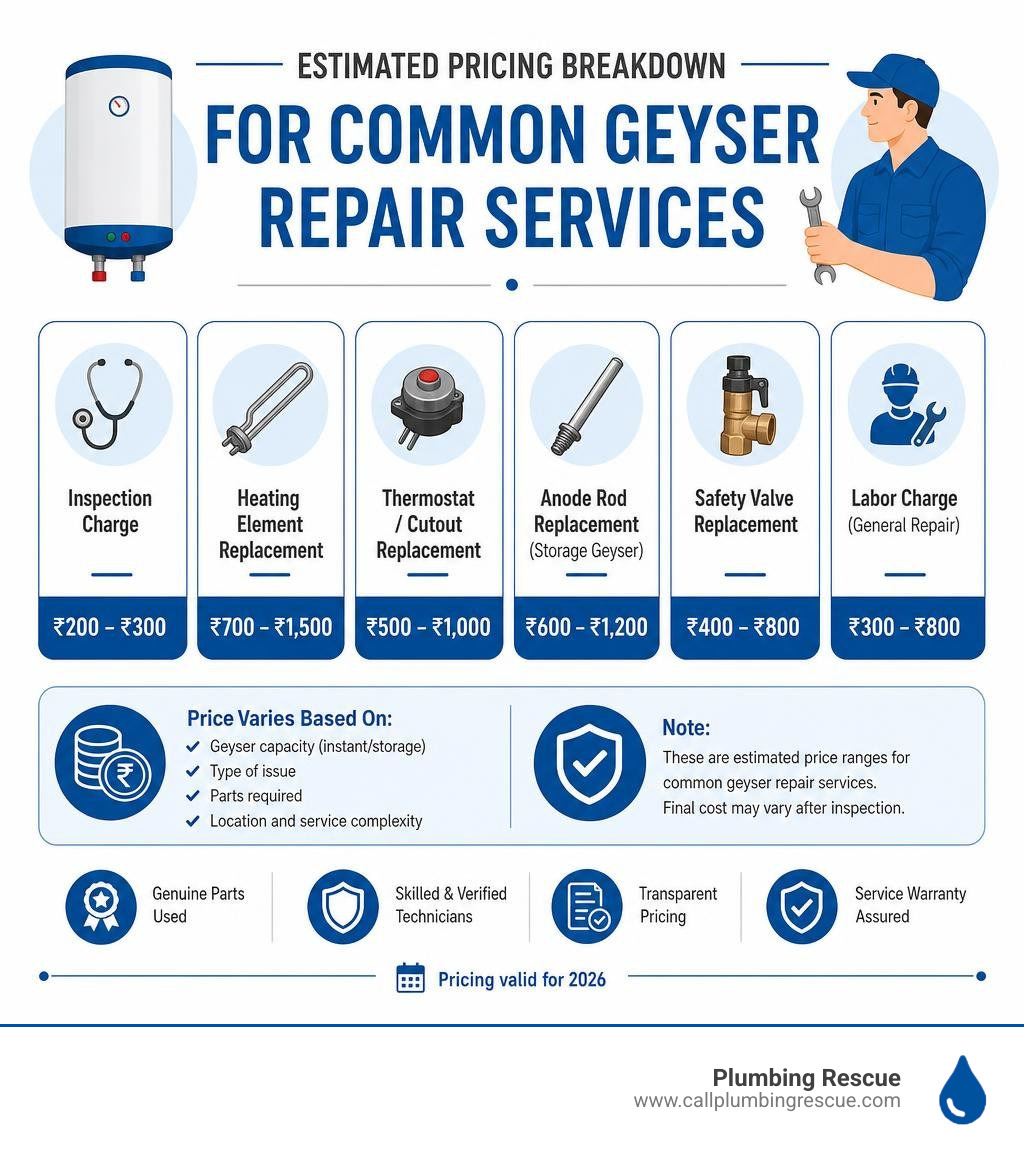
When selecting a repair partner, consider these guidelines:
- Transparent Diagnostic Rates: Ask about the base inspection or service-call fee before scheduling. Many providers apply this fee toward the final repair if you approve the work.
- Genuine Components: Ensure the technician installs authentic or correctly rated manufacturer-compatible spare parts to preserve appliance energy efficiency ratings and overall safety.
- Written Service Warranties: Reputable service platforms offer limited warranties on labor and installed components, with exact terms depending on the repair type and part availability.
Reviewing regional pricing breakdowns helps benchmark reasonable local quotes. For further guidance on selecting qualified mechanics, check out The Best Ways to Find AO Smith Water Heater Repair Pros.
Frequently Asked Questions About Bajaj Geyser Repair
How do I reset my Bajaj geyser after it overheats or trips?
To safely reset a tripped high-limit thermal switch, first disconnect the main power supply at the wall socket and switch off the circuit breaker. Unscrew the bottom plastic cover panel of the geyser to reveal the internal wiring layout. Locate the primary thermostat assembly, where you will find a small red or black protruding button. Press this button firmly until you feel a soft click. Reattach the lower cover, refill the tank completely with water, and restore power. If the unit trips repeatedly immediately after resetting, do not force operation; call a technician to inspect for short circuits or heavy limescale buildup.
How much does Bajaj geyser servicing and repair usually cost?
Typical geyser service and repair fees depend on your location, the model, and whether the technician needs to source Bajaj-specific parts. In many U.S. markets, costs are commonly grouped into these categories:
- Base Doorstep Inspection or Service-Call Fee: Often charged upfront and sometimes credited toward approved repairs
- General Servicing and Descaling: Usually priced according to tank size, access difficulty, and mineral buildup severity
- Thermostat or Heating Element Replacement: Varies based on labor time, electrical testing, gasket replacement, and part availability
- Complete Installation or Uninstallation: Depends on mounting requirements, plumbing connections, code requirements, and disposal needs
Always request a written estimate before work begins, especially if the appliance uses imported or less commonly stocked replacement components.
Should I repair my Bajaj geyser or replace it entirely?
If your geyser is under 6-8 years old and experiencing isolated faults like a failed thermostat, worn gasket, or damaged heating element, repairing the unit is far more cost-effective. However, if the water heater is over 10 years old, experiencing persistent inner tank structural leakage, or requiring frequent electrical repairs, full replacement is the wiser investment. Older water heaters lose efficiency over time, while modern models offer updated safety features and superior energy savings.
Conclusion
A well-maintained Bajaj geyser delivers years of comfortable, safe hot water. By conducting annual descaling, replacing sacrificial anode rods promptly, and recognizing early warning signs like slow heating or valve drips, you can easily avoid sudden winter breakdowns.
When tackling DIY repair tasks, prioritize personal safety above all else: turn off circuit breakers, verify dead electrical lines with a multimeter, and ensure tanks are fully primed with water before switching power back on. For complex leaks, structural tank damage, or internal short circuits, relying on licensed professionals guarantees that repairs meet strict electrical and safety codes.
For reliable guidance or full home water heating support across the United States, our team at Plumbing Rescue provides comprehensive, round-the-clock expertise for every household plumbing challenge. Explore our complete range of remedies at Professional Water Heater Services to keep your home’s hot water flowing safely and efficiently year-round.
Dealing With This Yourself? Talk to a Licensed Plumber.
Skip the guesswork — get a straight answer from a local pro. Available 24/7, no forms, no waiting.
Call Now: (888) 686-0698